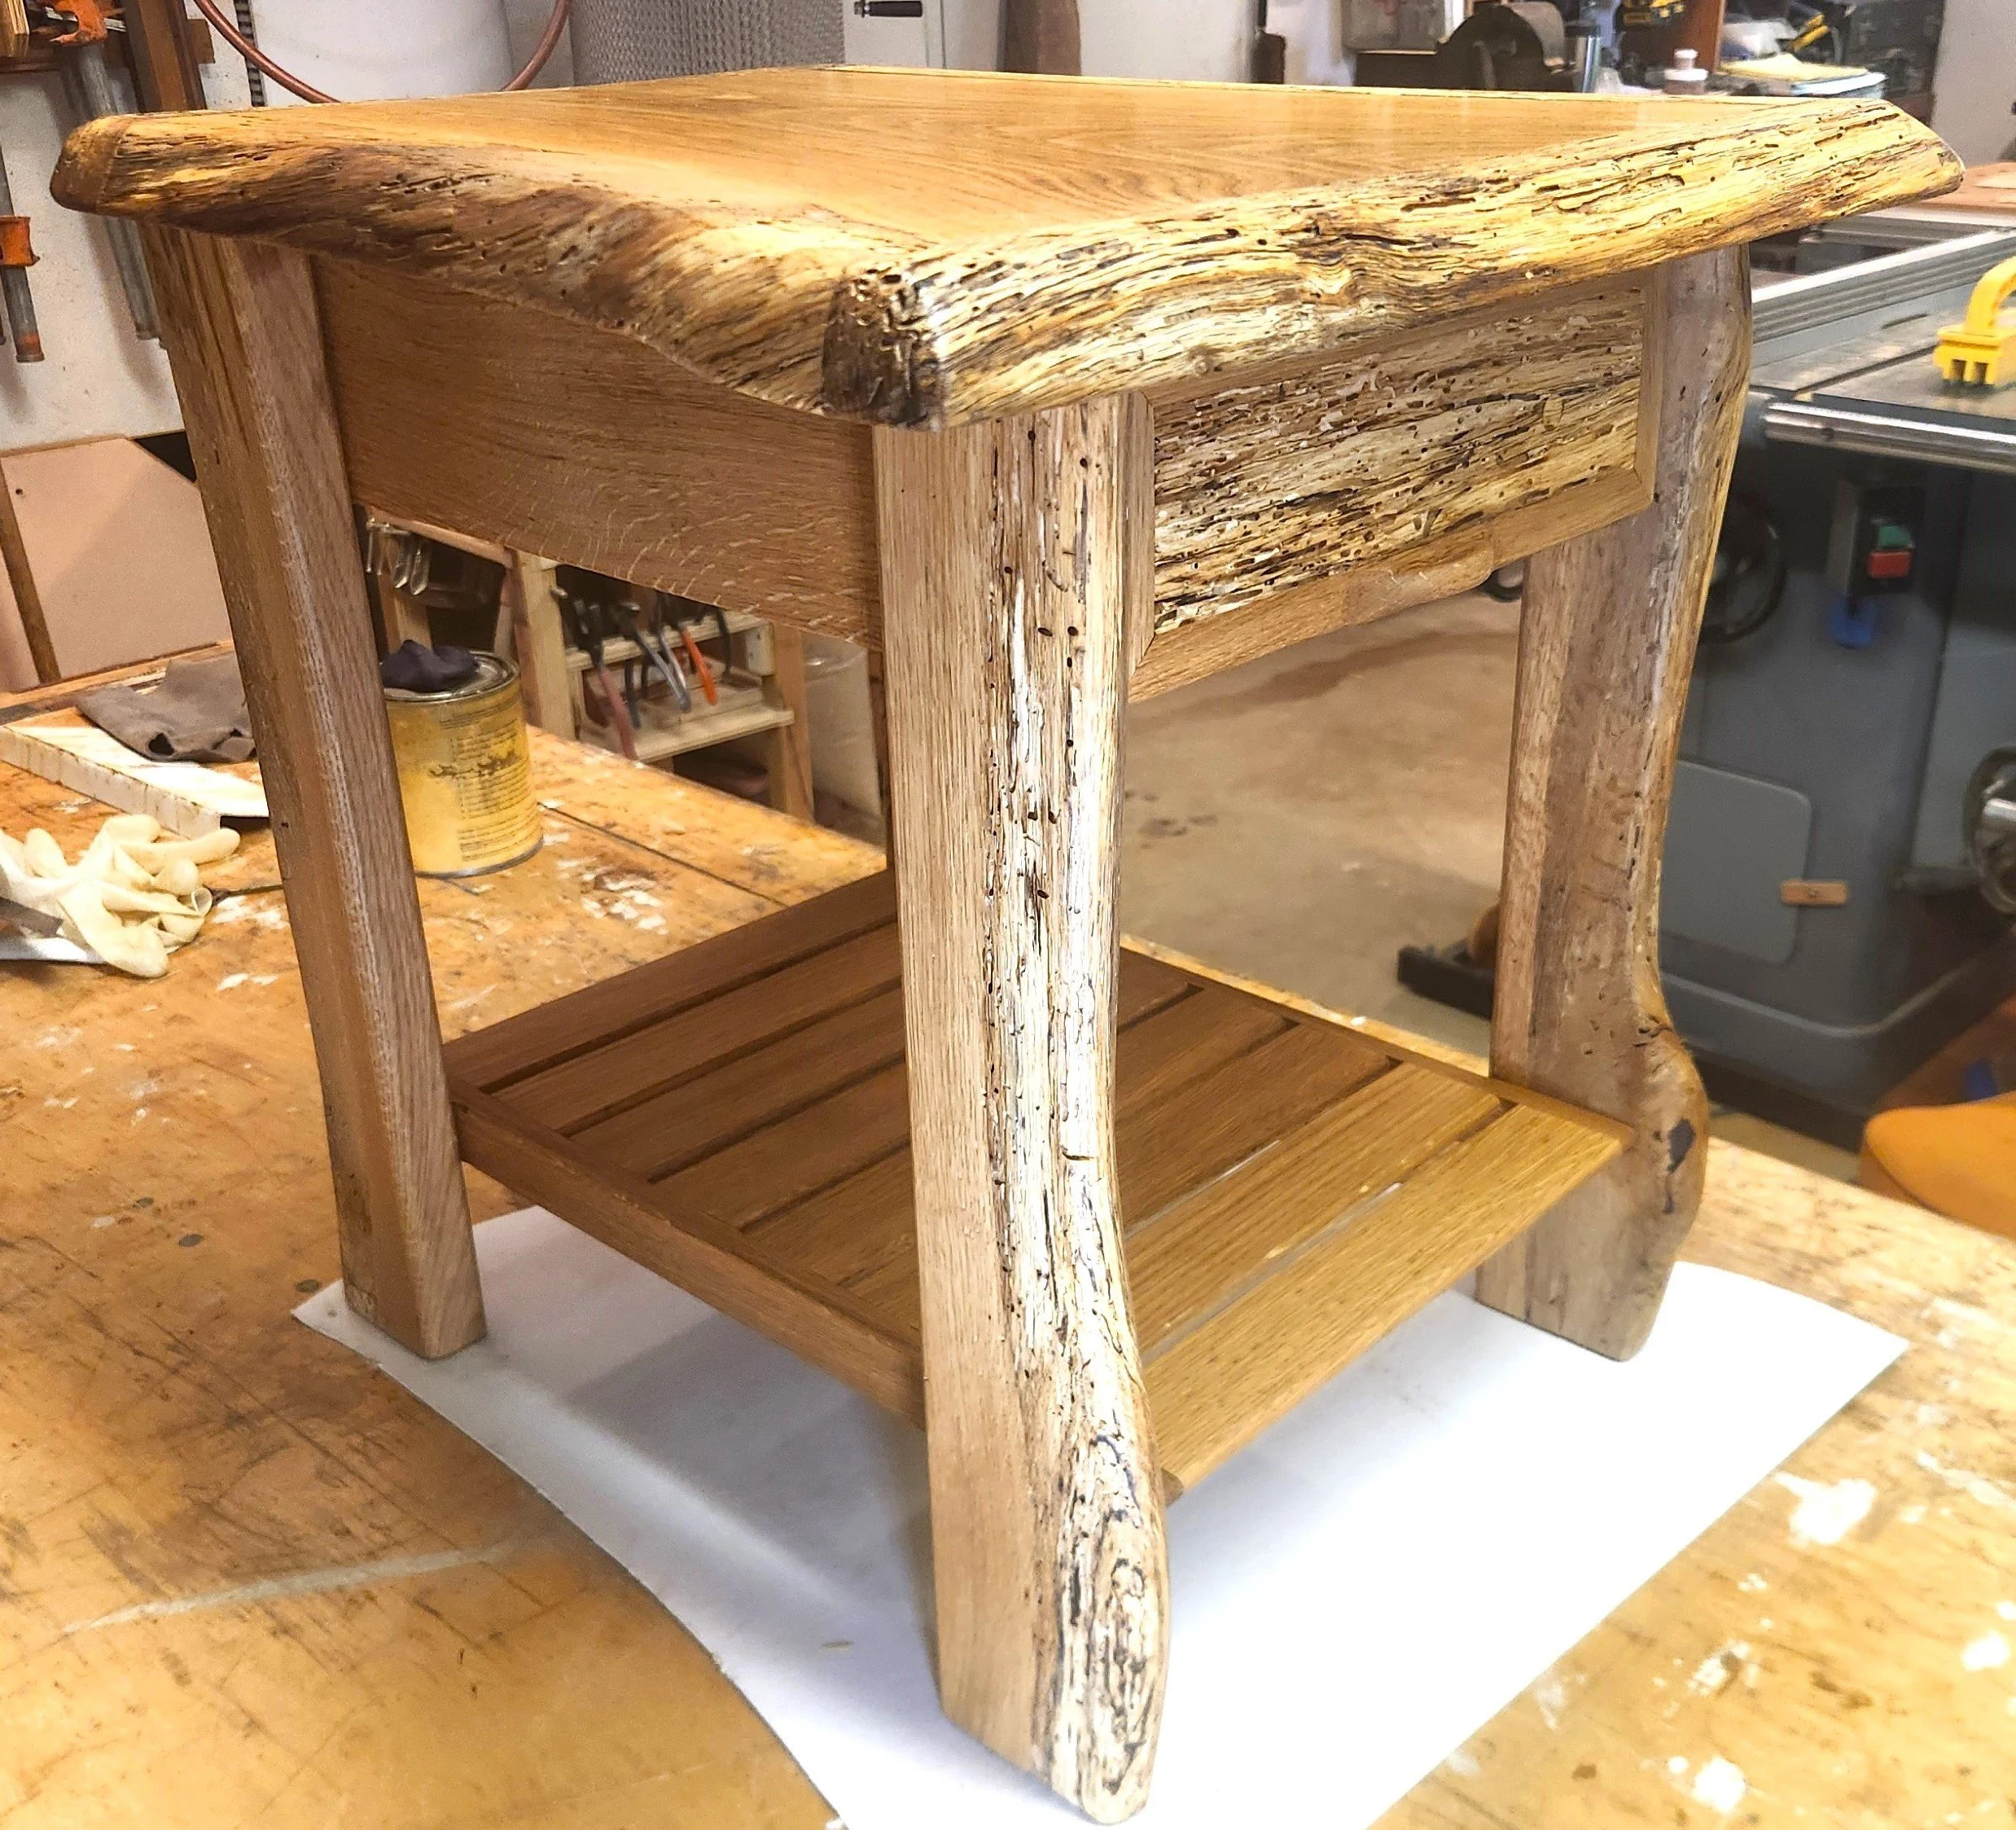
In 2012 a derecho tore though Lynchburg and toppled countless trees. An acquaintance of mine salvaged some of the logs and resawed them into slabs. He stickered and covered them; sold a few and then cast his efforts elsewhere. I purchased two white oak slabs, approximately 80” x 30” x 2”. Never having attempted a live edge piece I figured it was time.
Our front door leads directly into the Living Room. An ugly white cabinet resided against the wall to the left of the direction of travel. I have had my eye on this spot since our 2016 move-in. Something special was needed, and this was it. I use our house as a testing ground for new projects. If a piece succeeds, then great – we have a new house guest. If not, then it goes to elsewhere. So far everything has stayed.
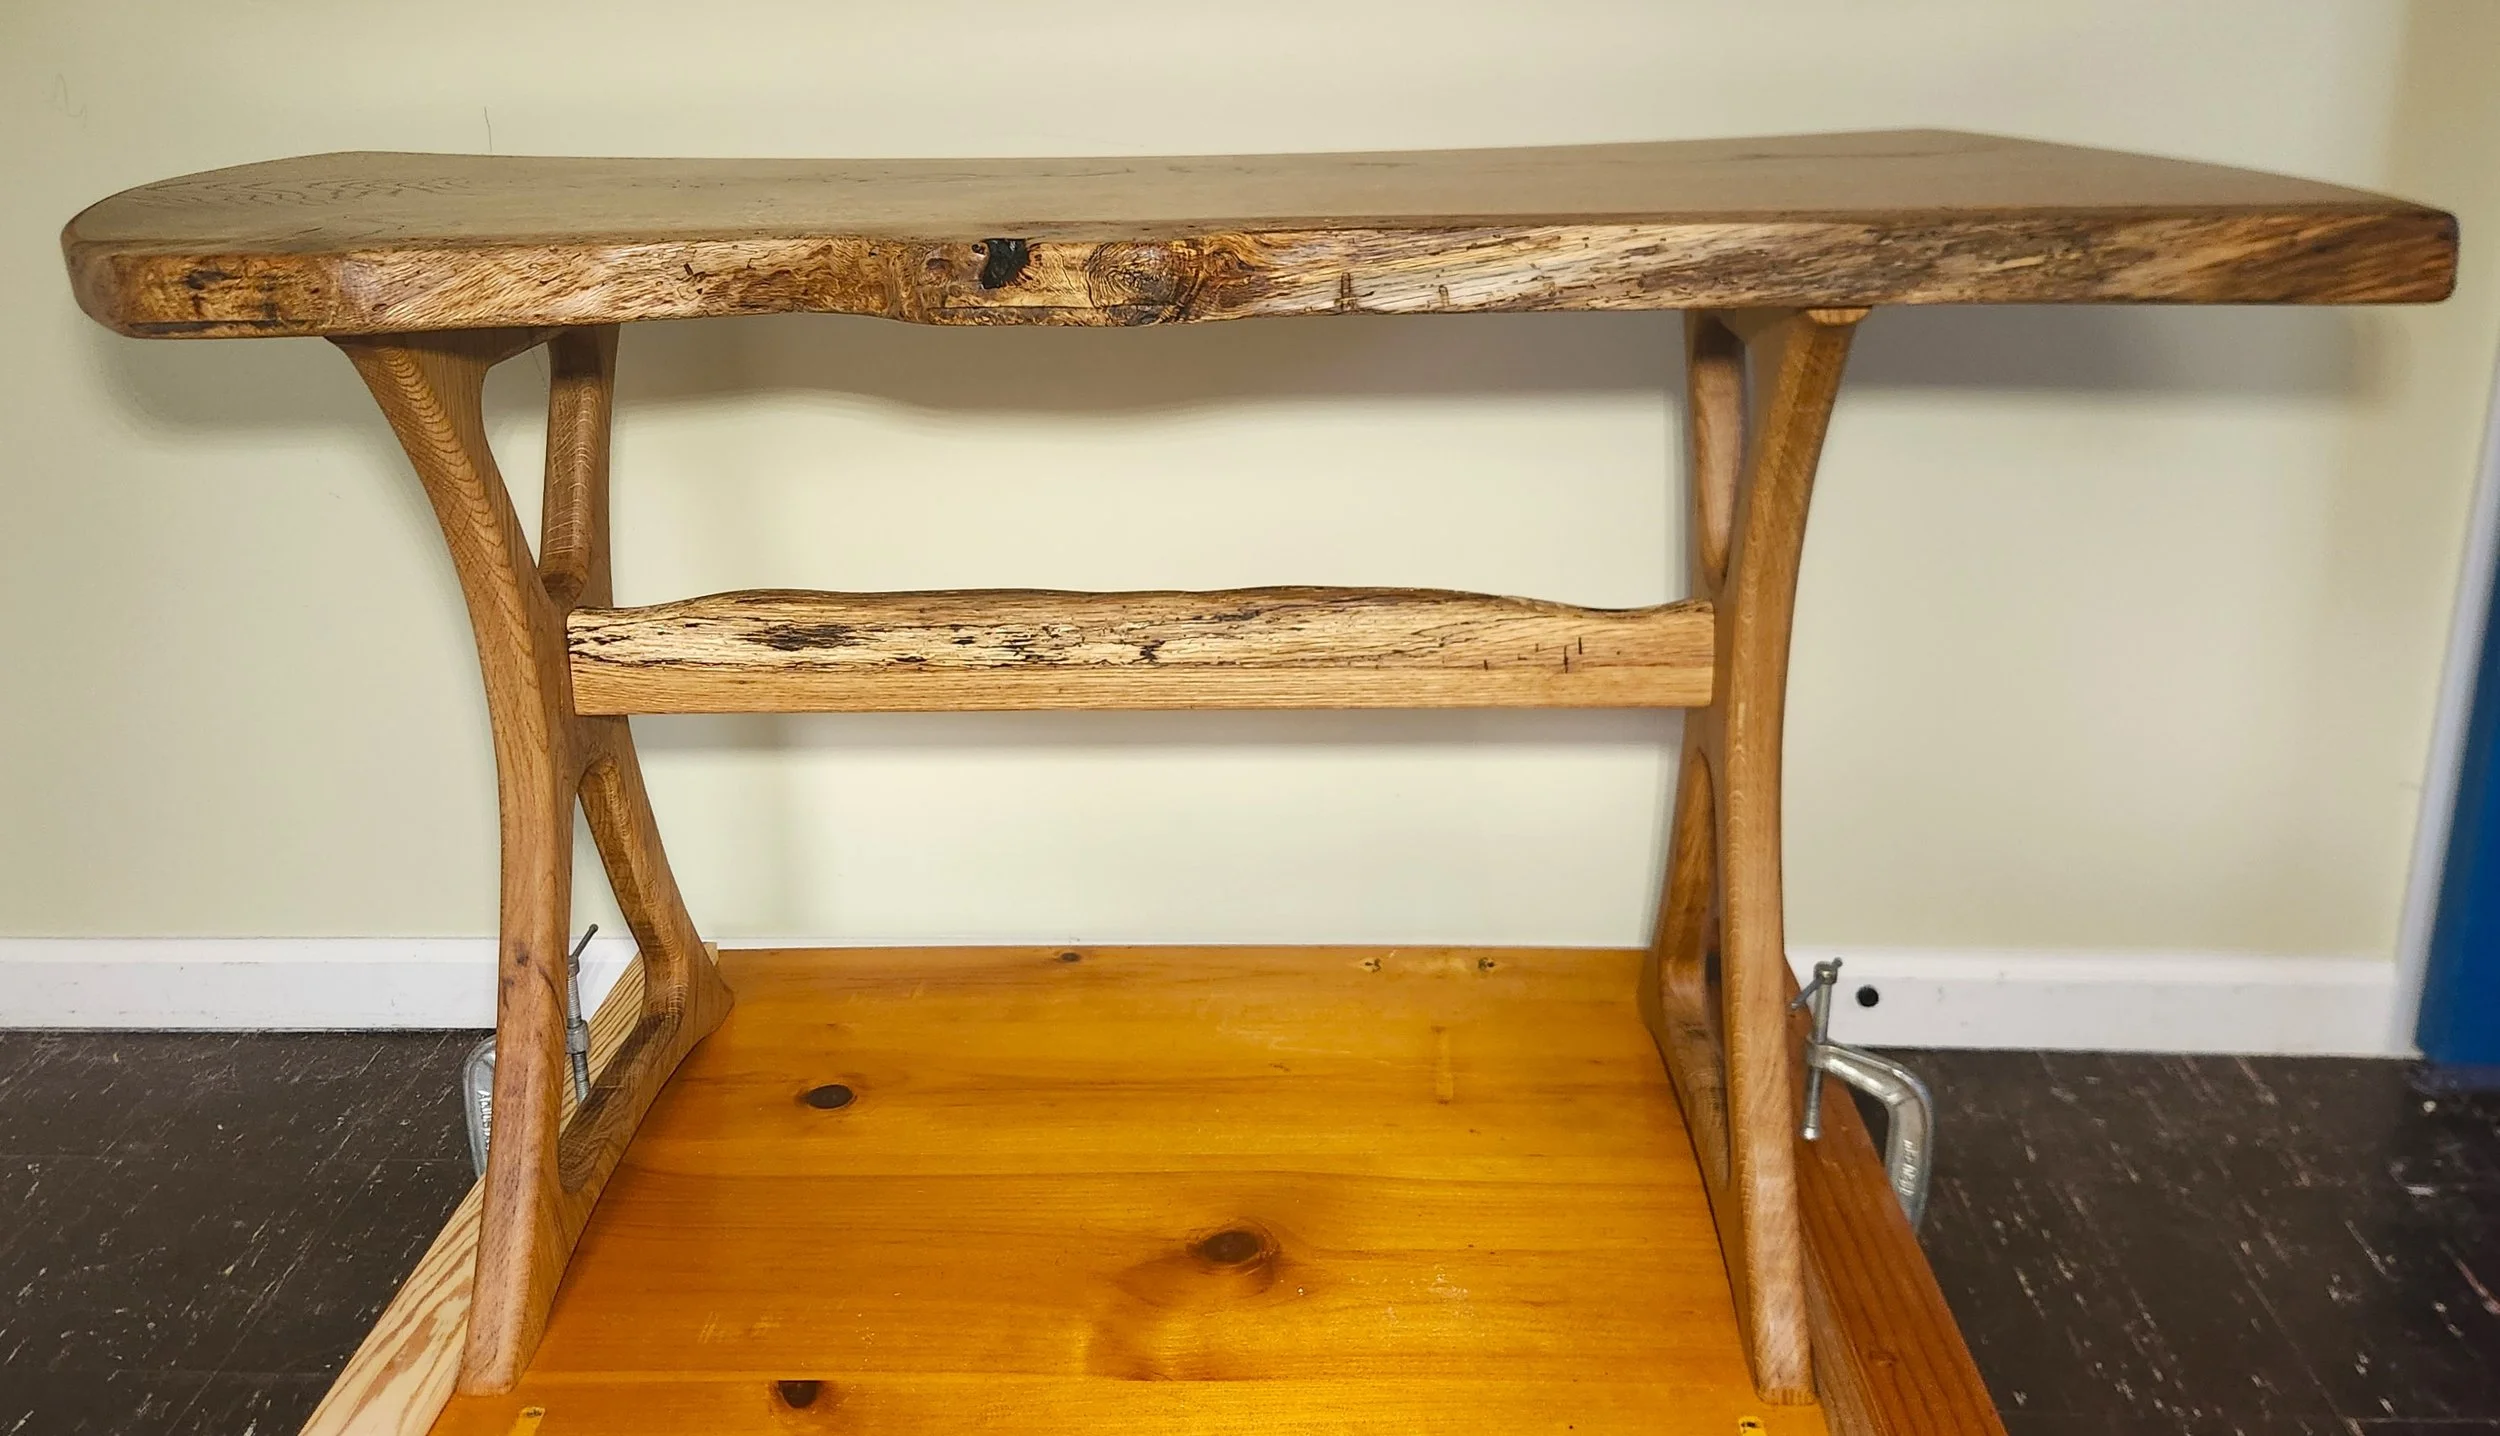
This new piece needed to minimize its visual mass. I like the idea of floating. And cantilevering. This shelf does both.
The process of preparing a live edge slab is, for the uninformed, a toilful one. I went from uninformed to informed in one week, and this is how…………
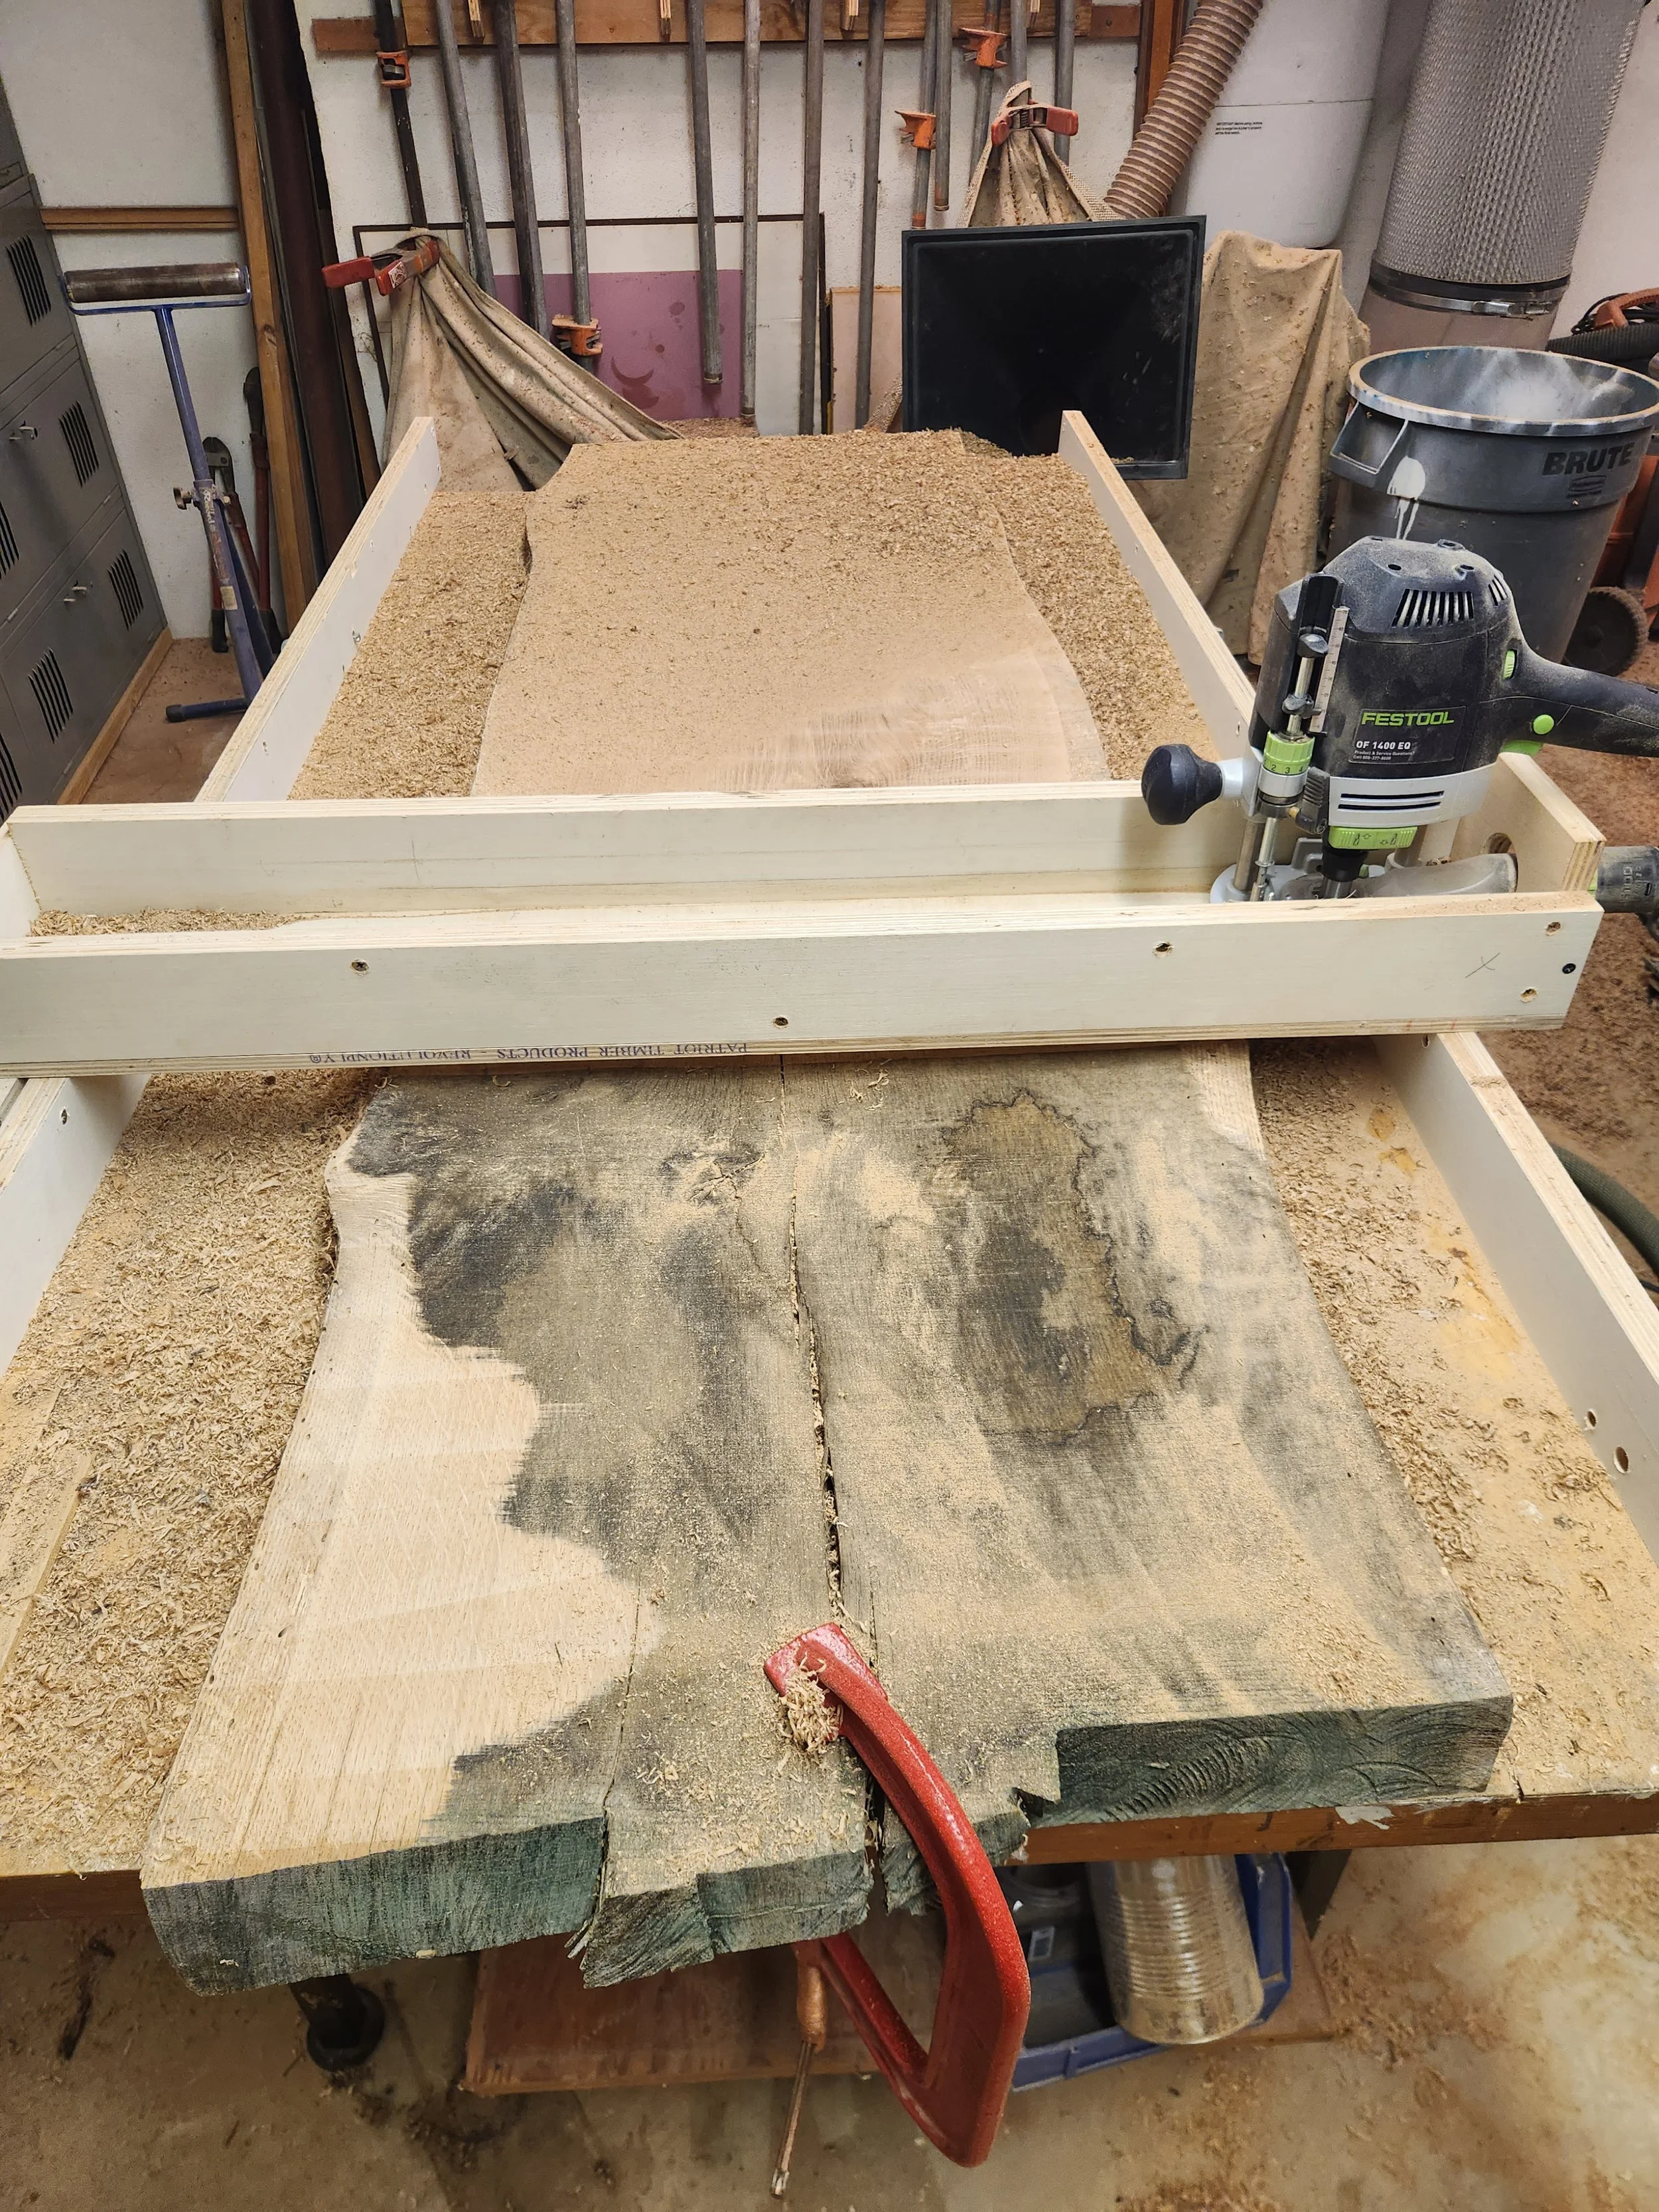
First thing – a live edge slab of white oak is damn heavy. I figured my appliance dolly would help moving it around. Wrong. Its length made it top heavy. Dragging works.
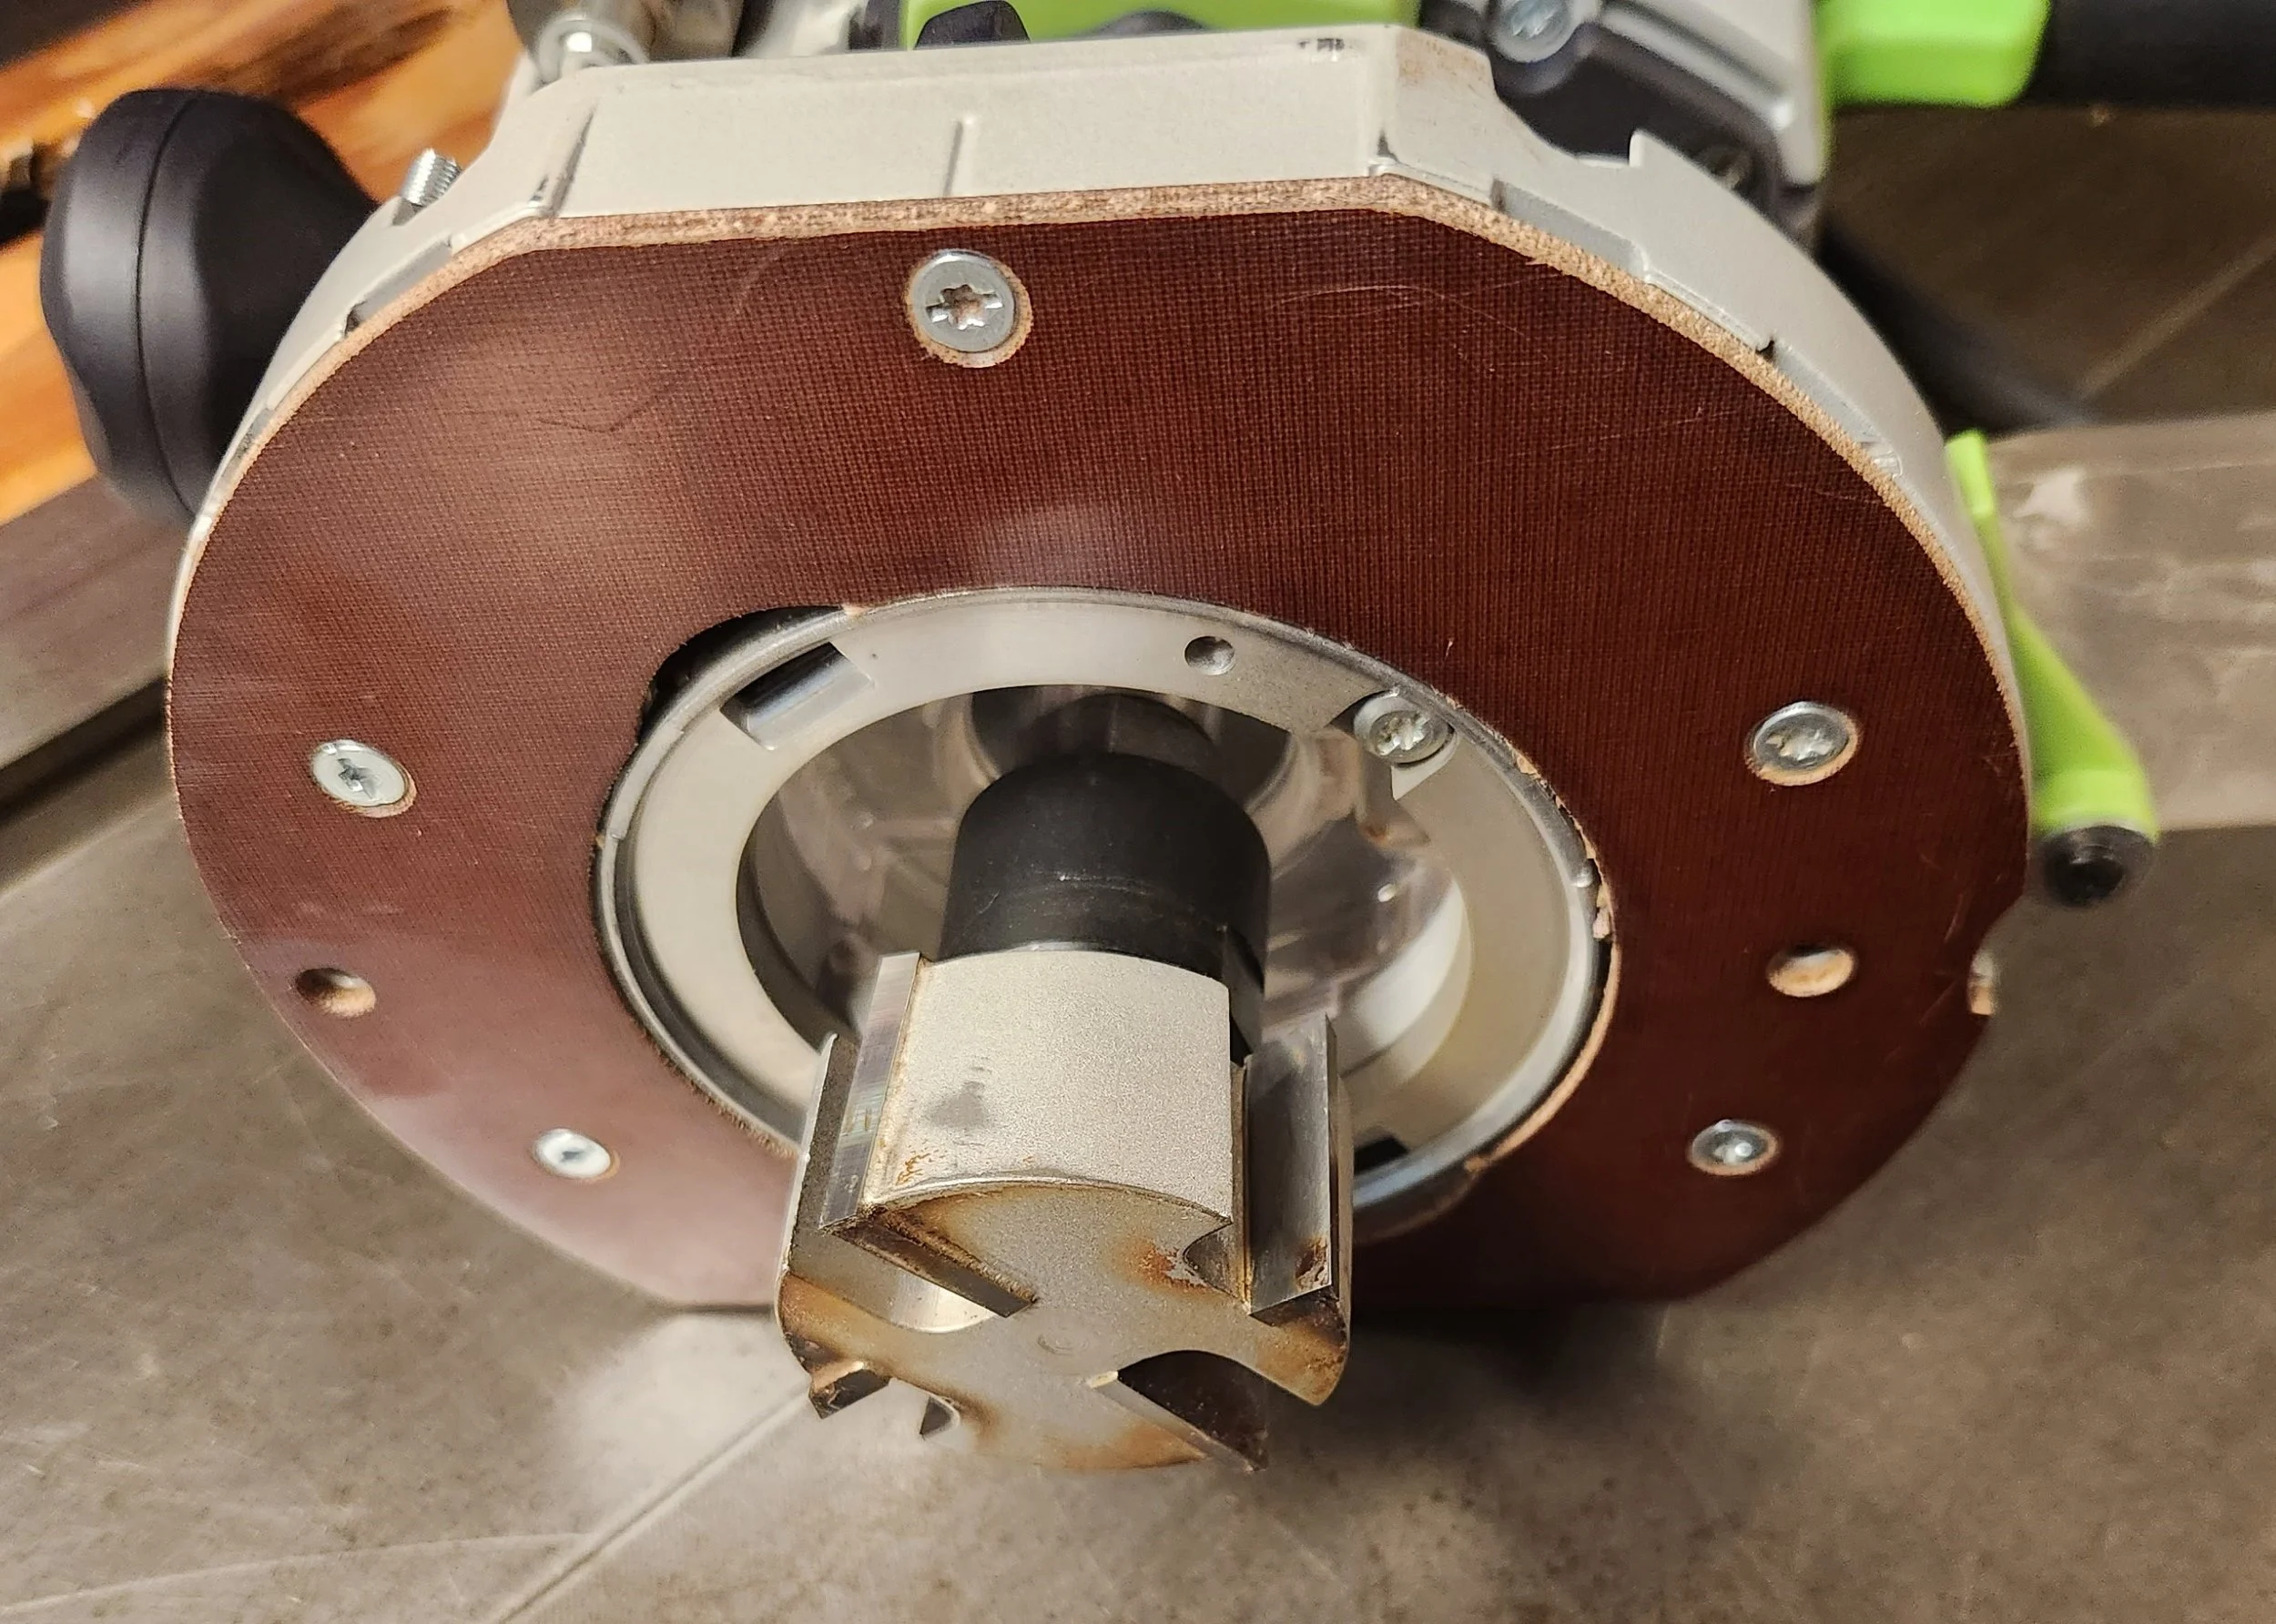
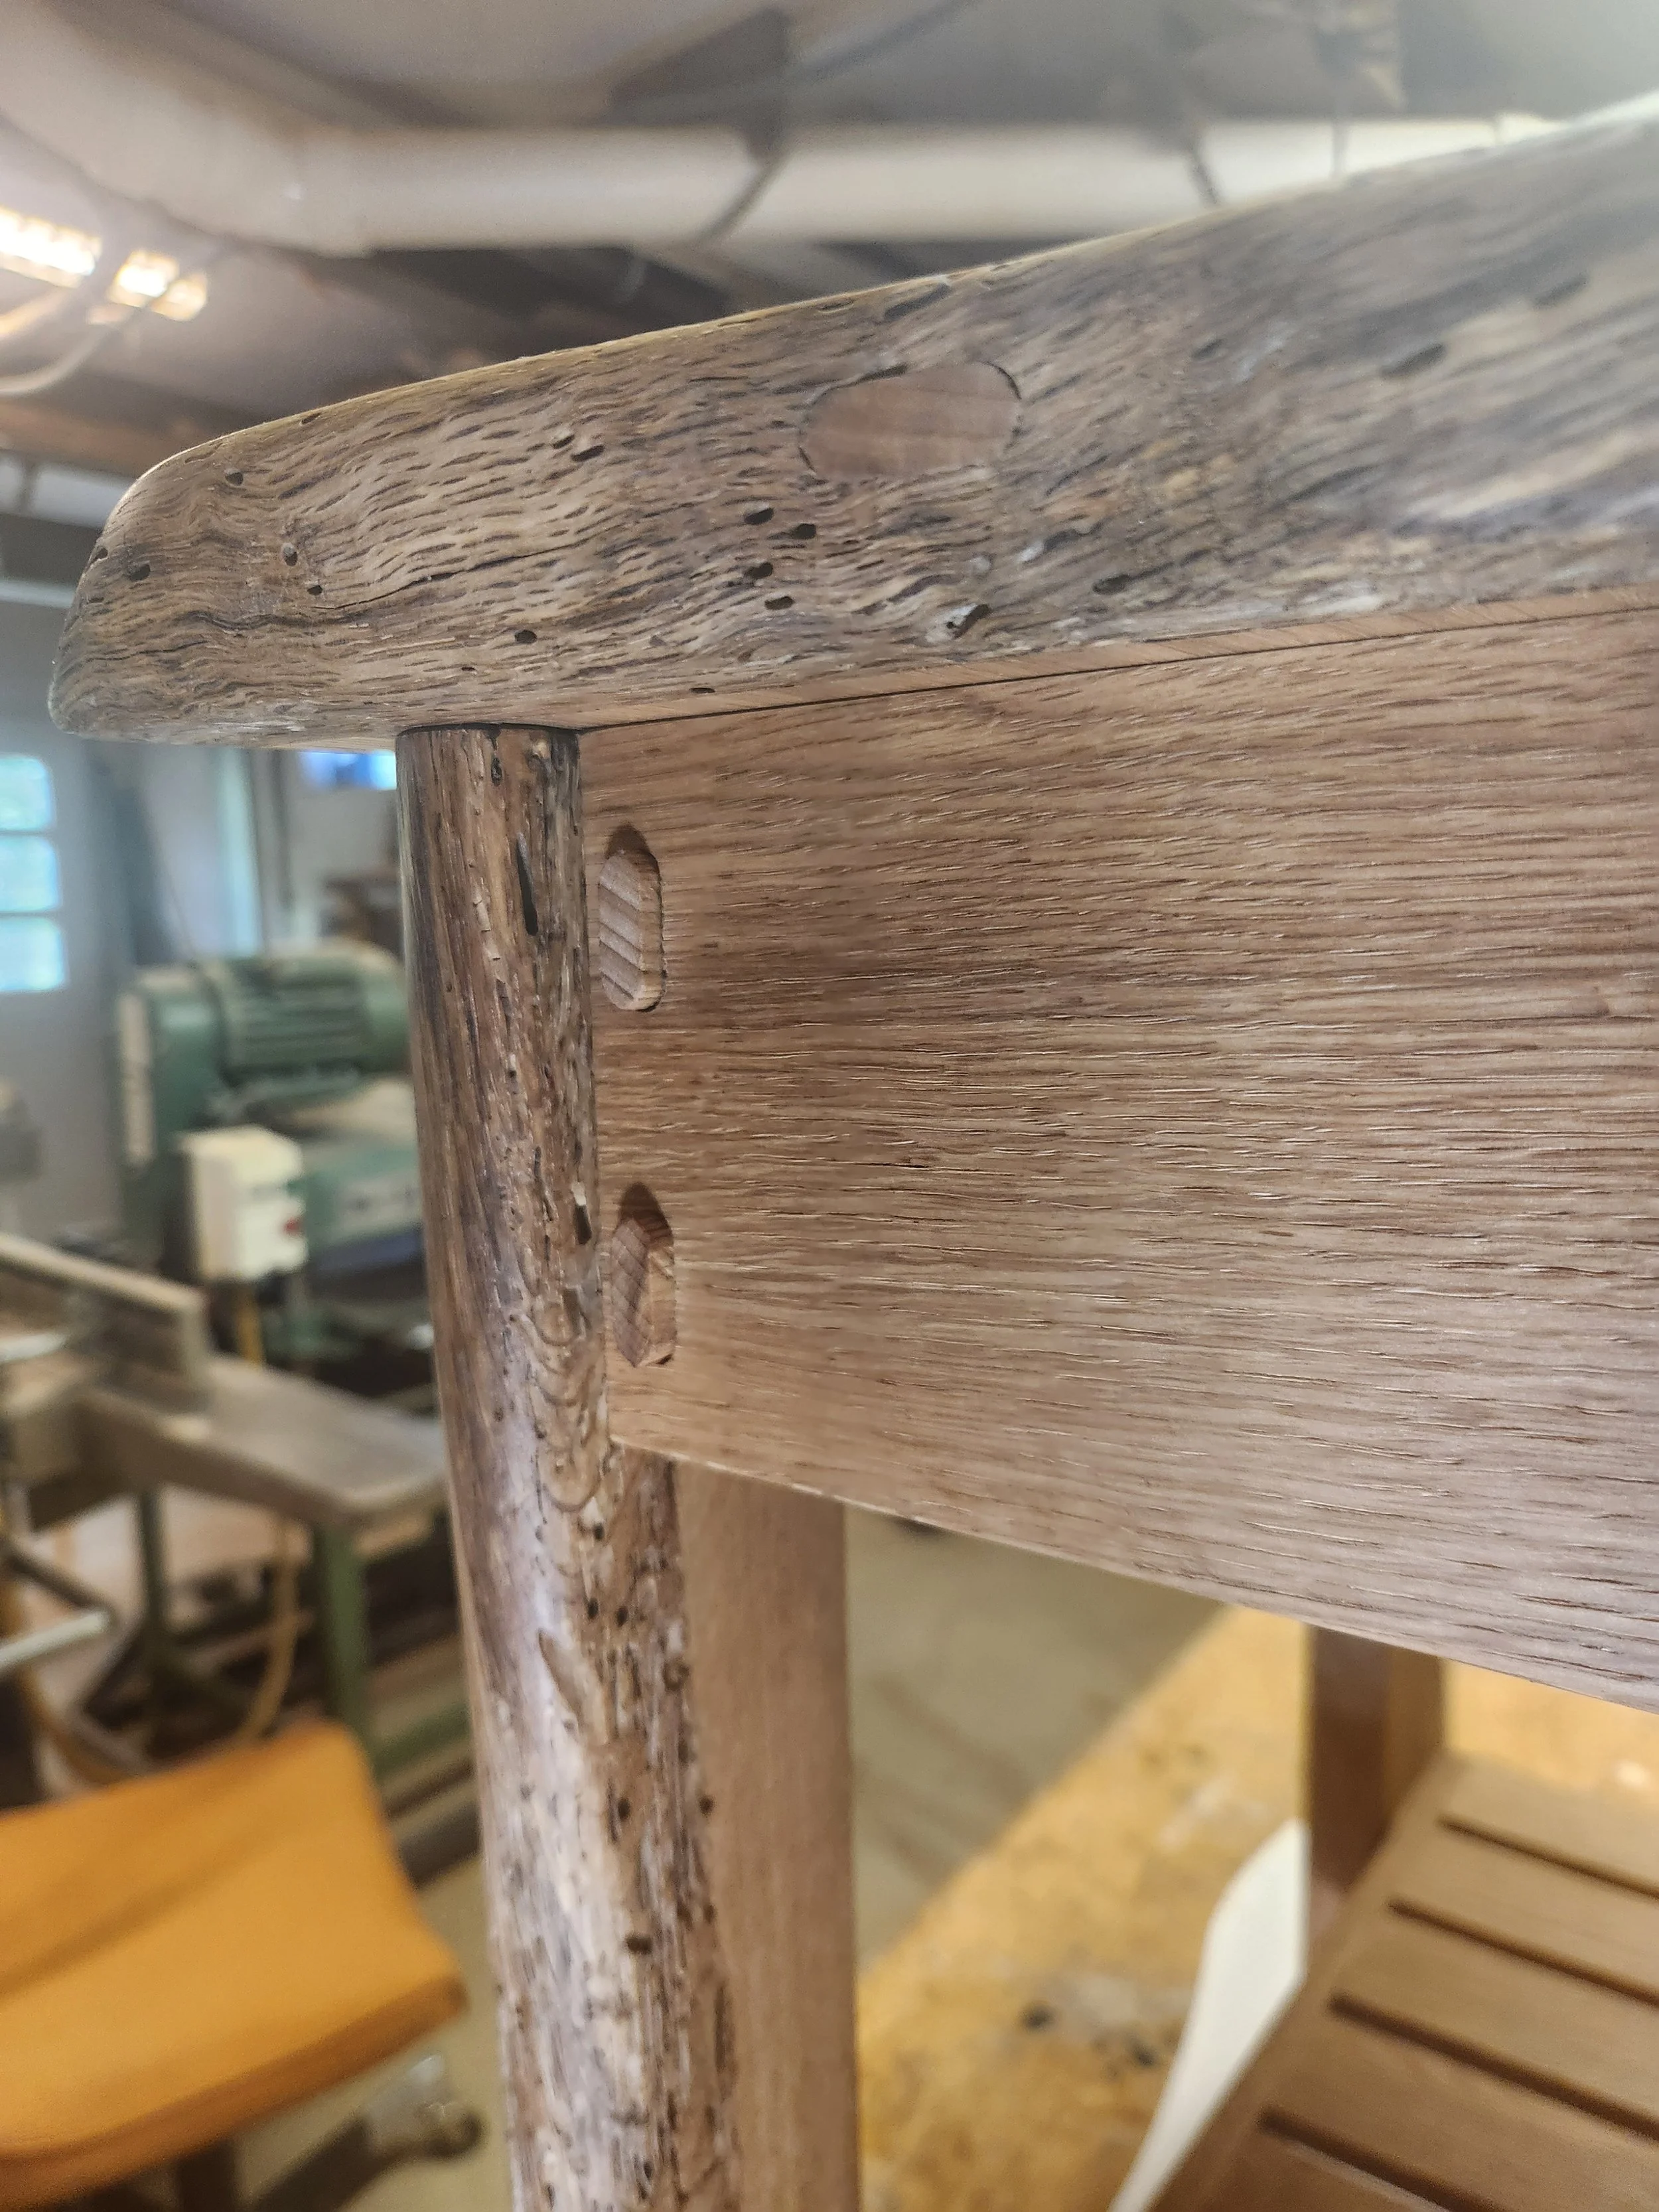
The top and bottom surfaces need to be flat and parallel. This is called flattening. Youtube showed me how to make a flattening jig for a router. Then a specialized router bit is needed. Bought one. It is a honkin big piece of steel and carbide 2” in diameter. The usual joy experienced when getting a new tool was quickly eclipsed by the dogged persistence needed to hog out the slab’s ups and downs to achieve flatness. After slogging through this for two days I had two slabs with level and parallel surfaces. Also more than four trash cans full of shavings.
The better slab was trimmed to size for the table. The other slab was cut up into 2” thick pieces for the two support brackets.
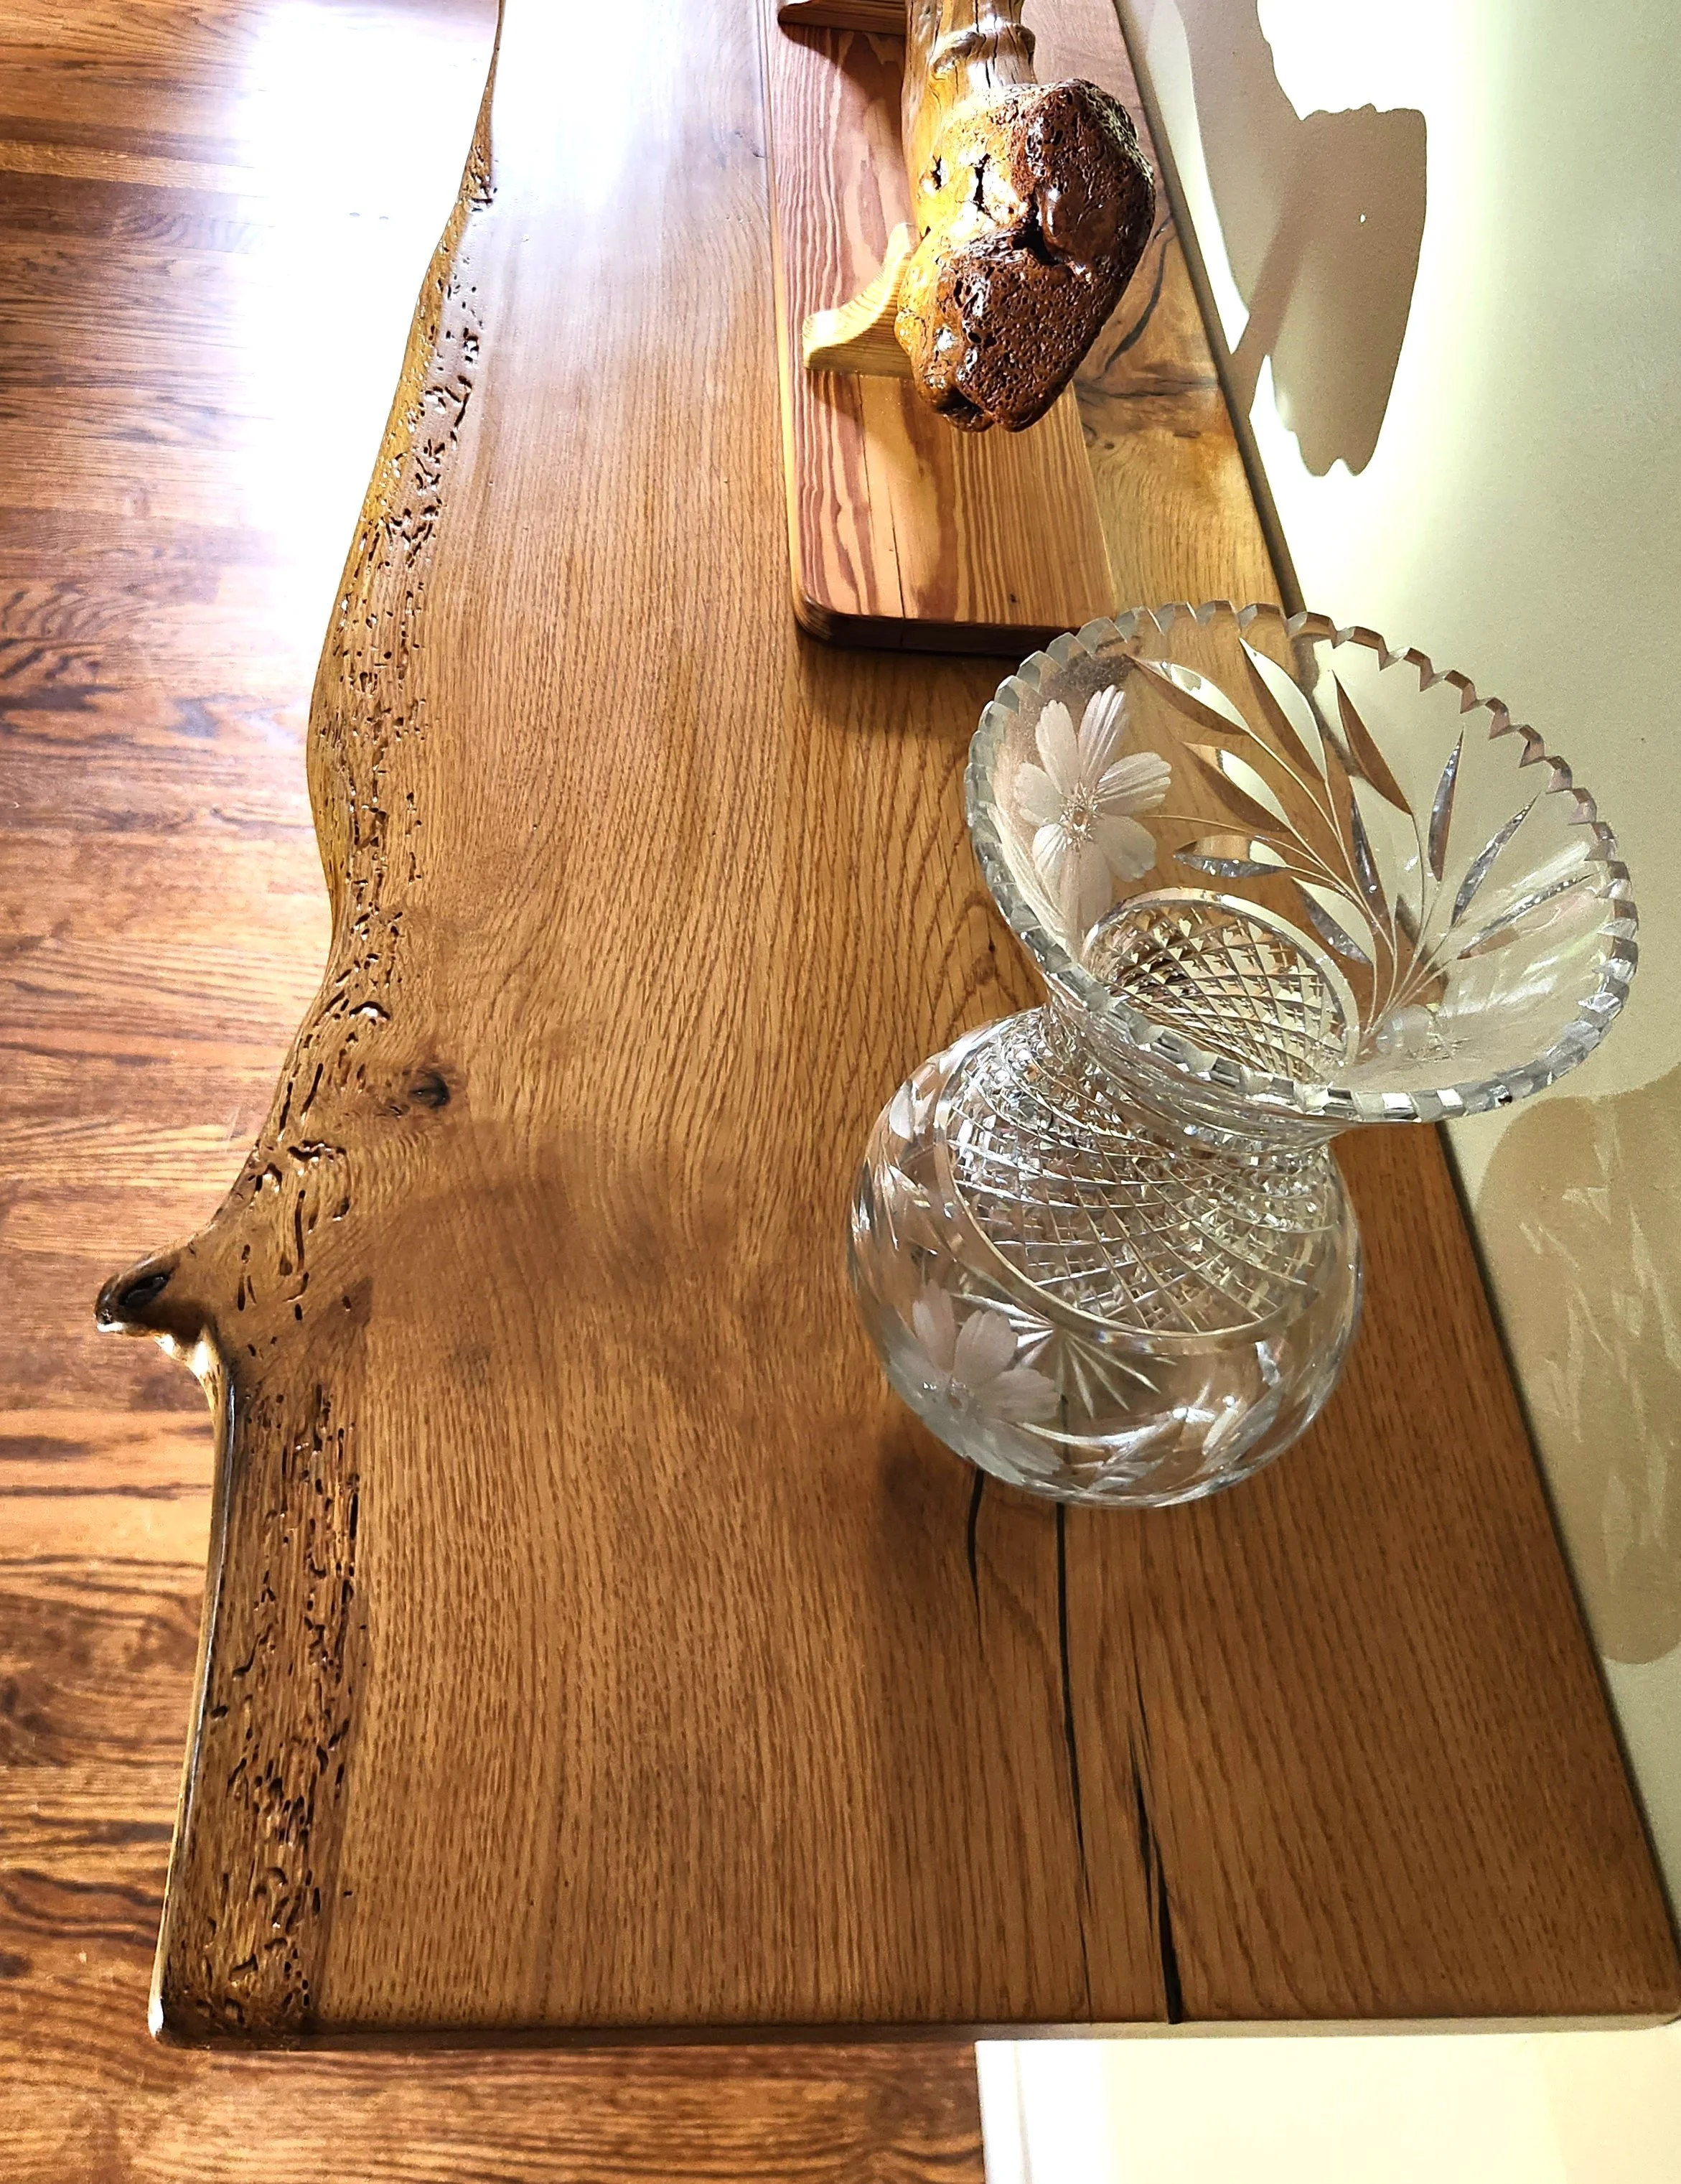
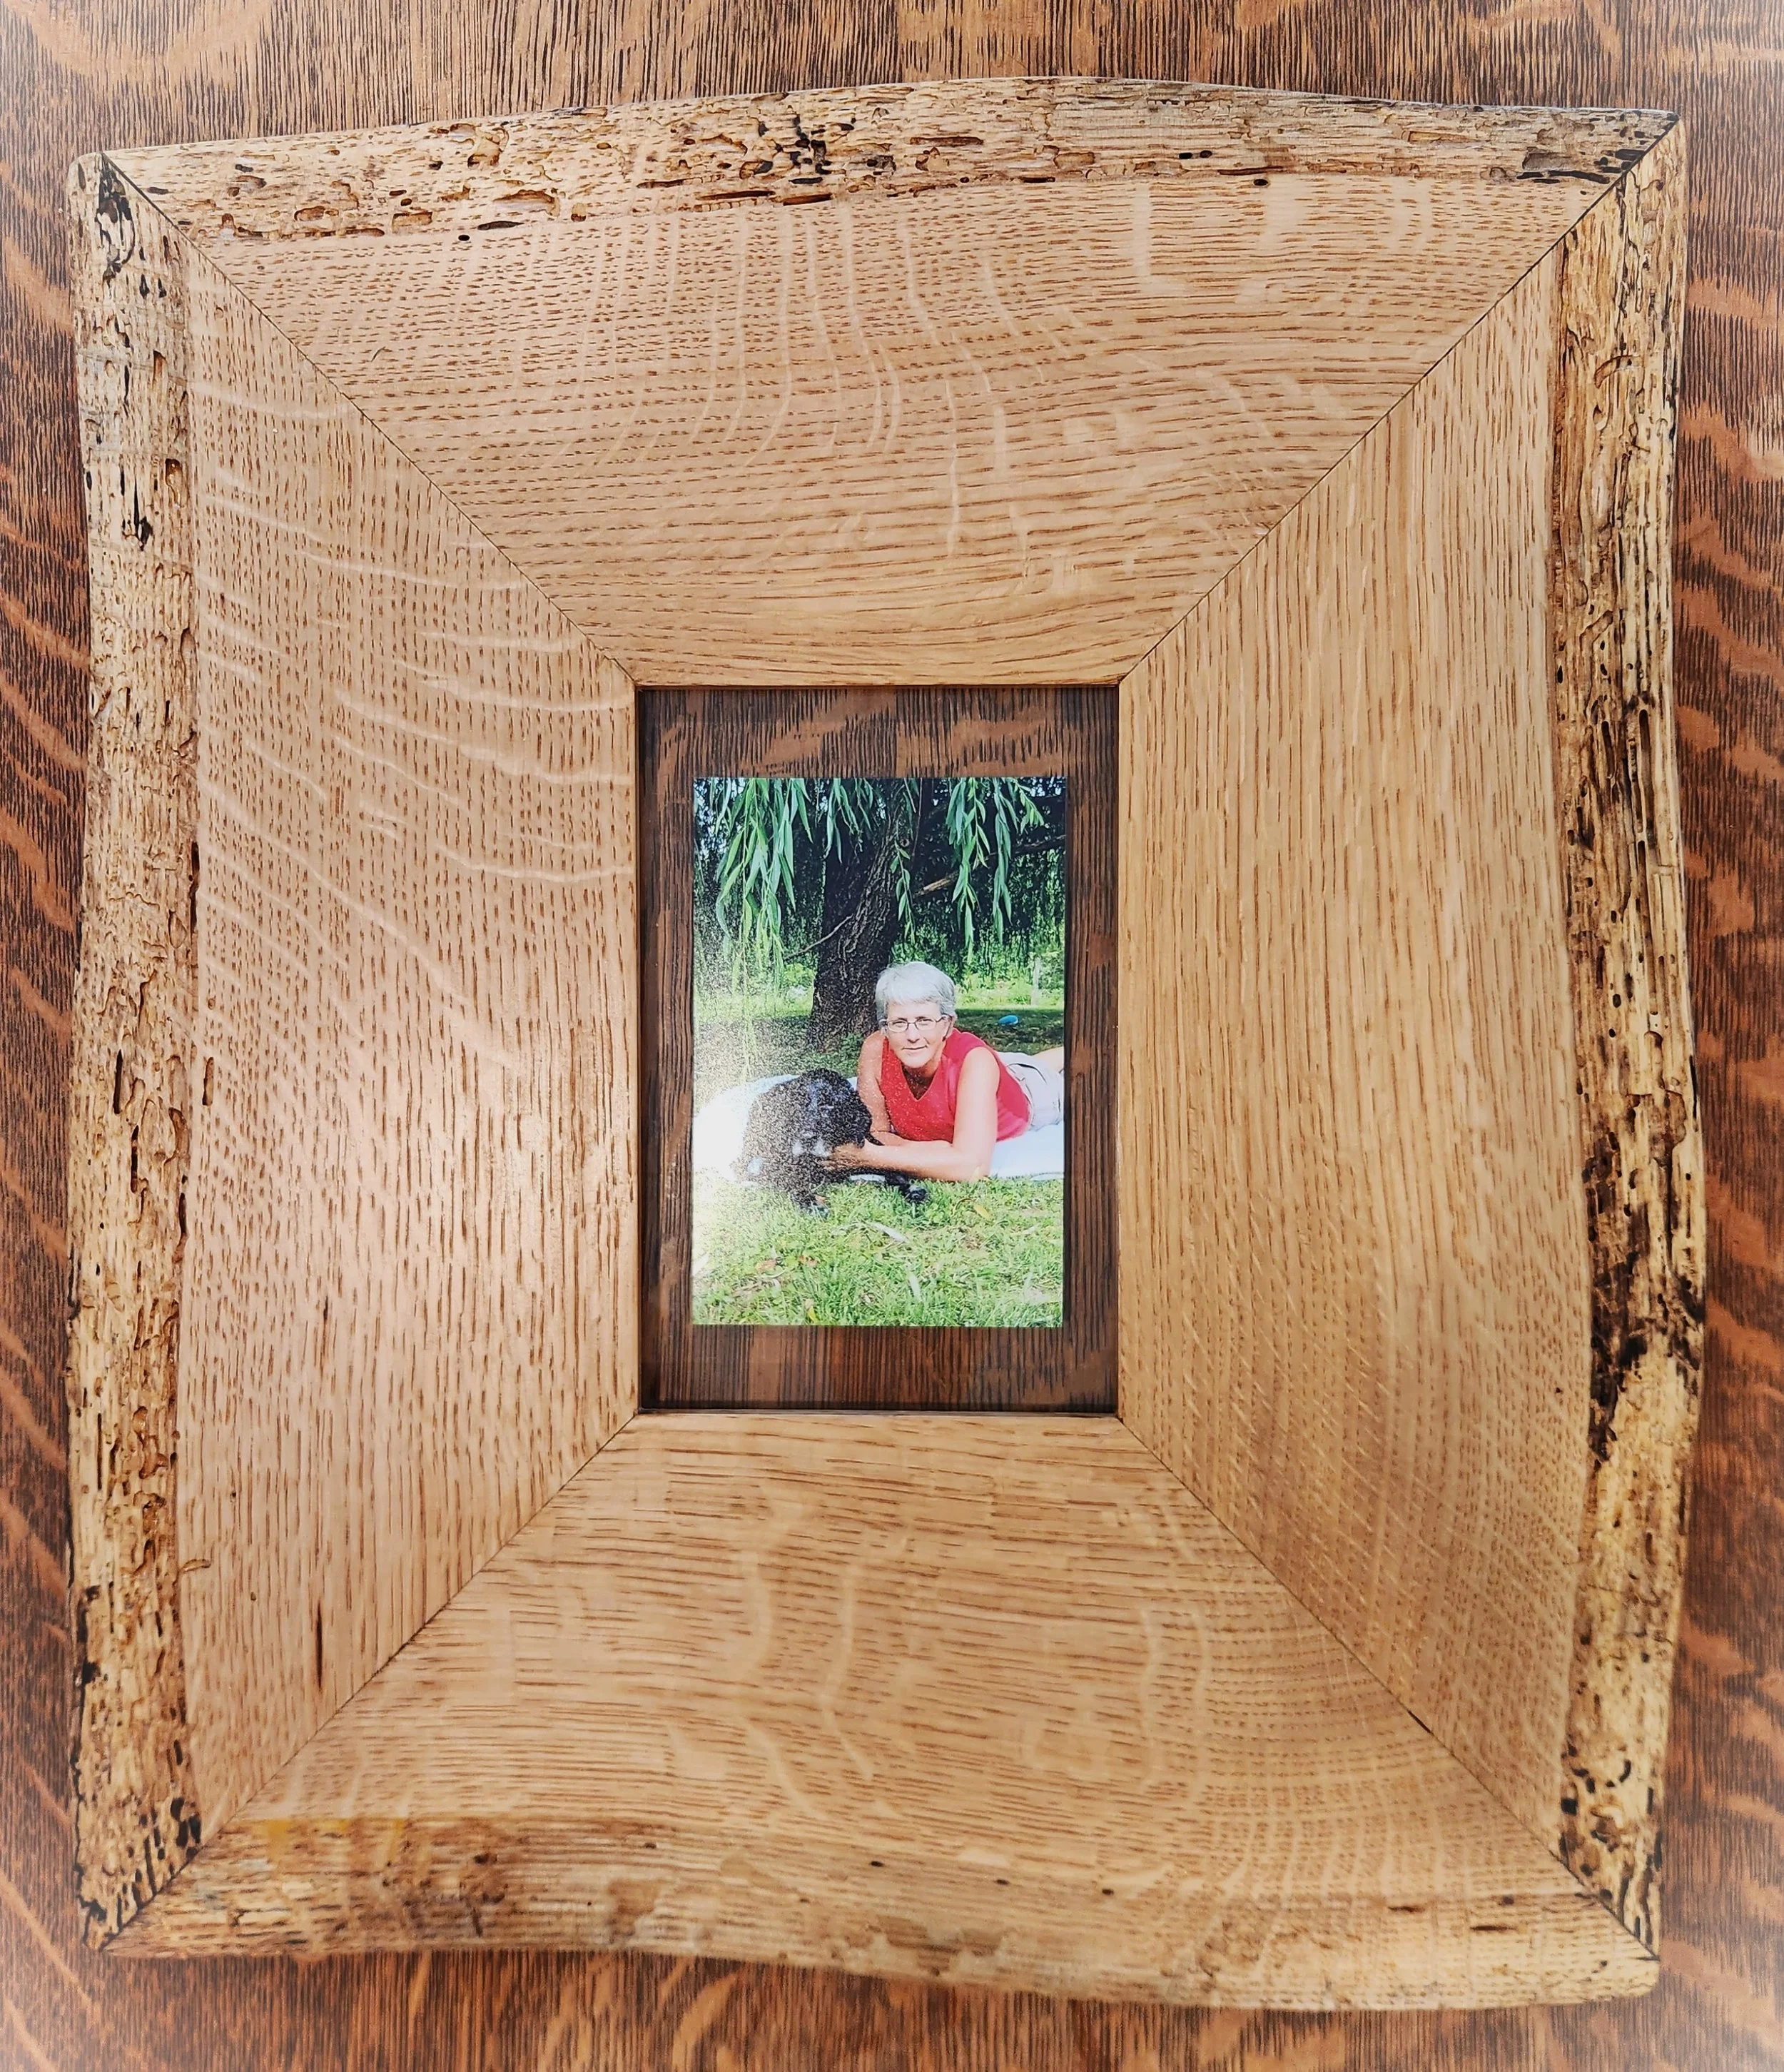
Since the slabs had cured outside for ten years there was insect activity at the live edges. Similar to my rhododendron root pieces, I embrace the texture of the wood borers’ efforts. I enjoy the dichotomy of smoothness versus roughness. When I craft a live edge slab for kitchen or dining use, then these borer holes and tunnels will be filled with epoxy and sanded smooth. Not needed for this piece.
Live edges are typically the softest part of the slab. Since these have the borer holes they are further weakened. I applied liquid epoxy to the back sides to strengthen and provide stability.
Live Edge


Steel stop that holds the leading edge of the support bracket in place

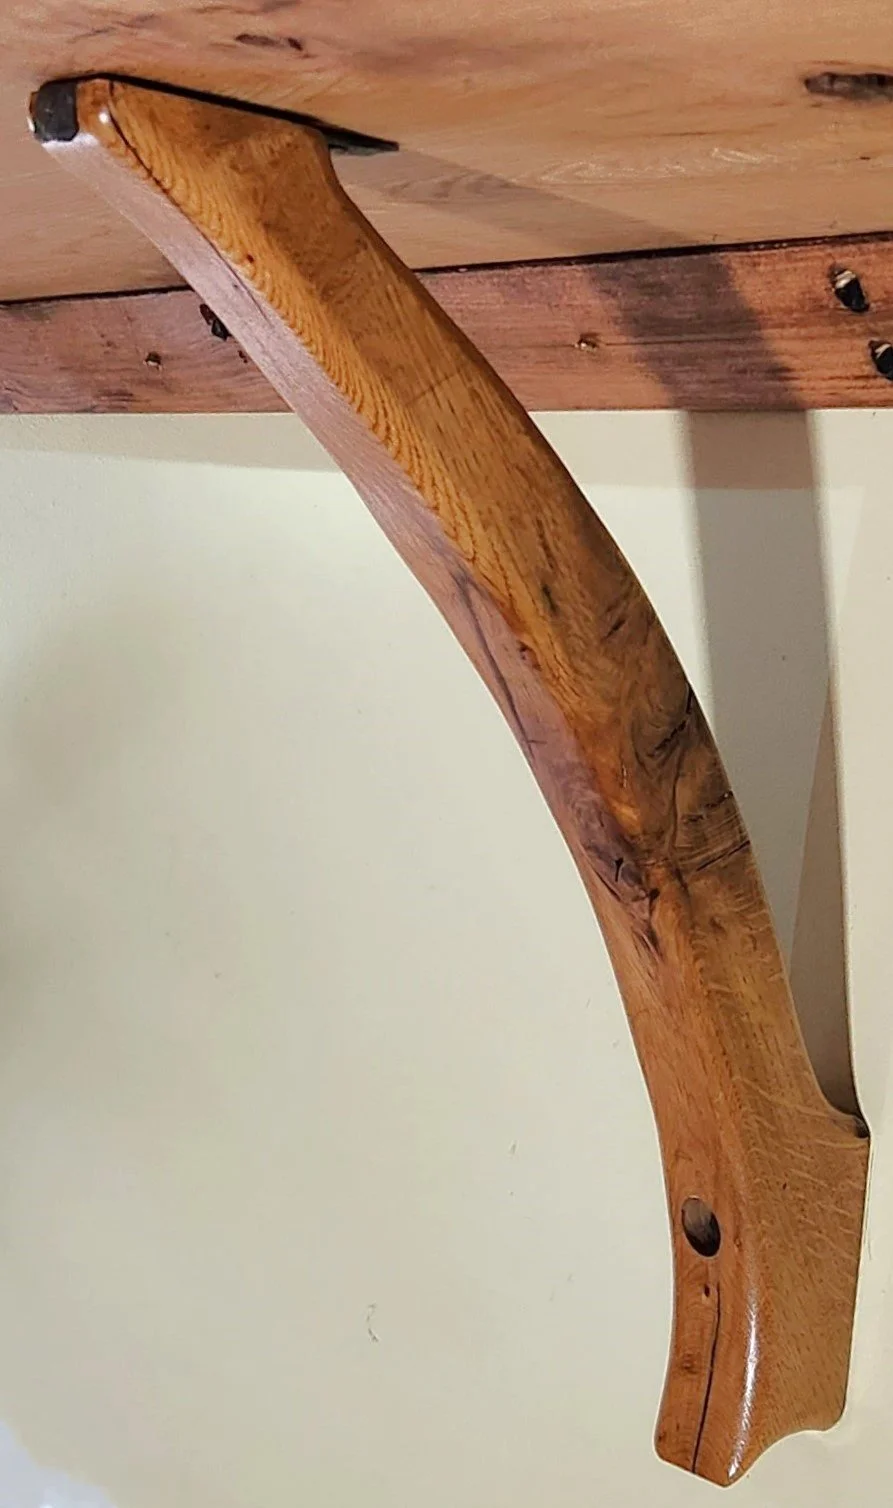
Support bracket


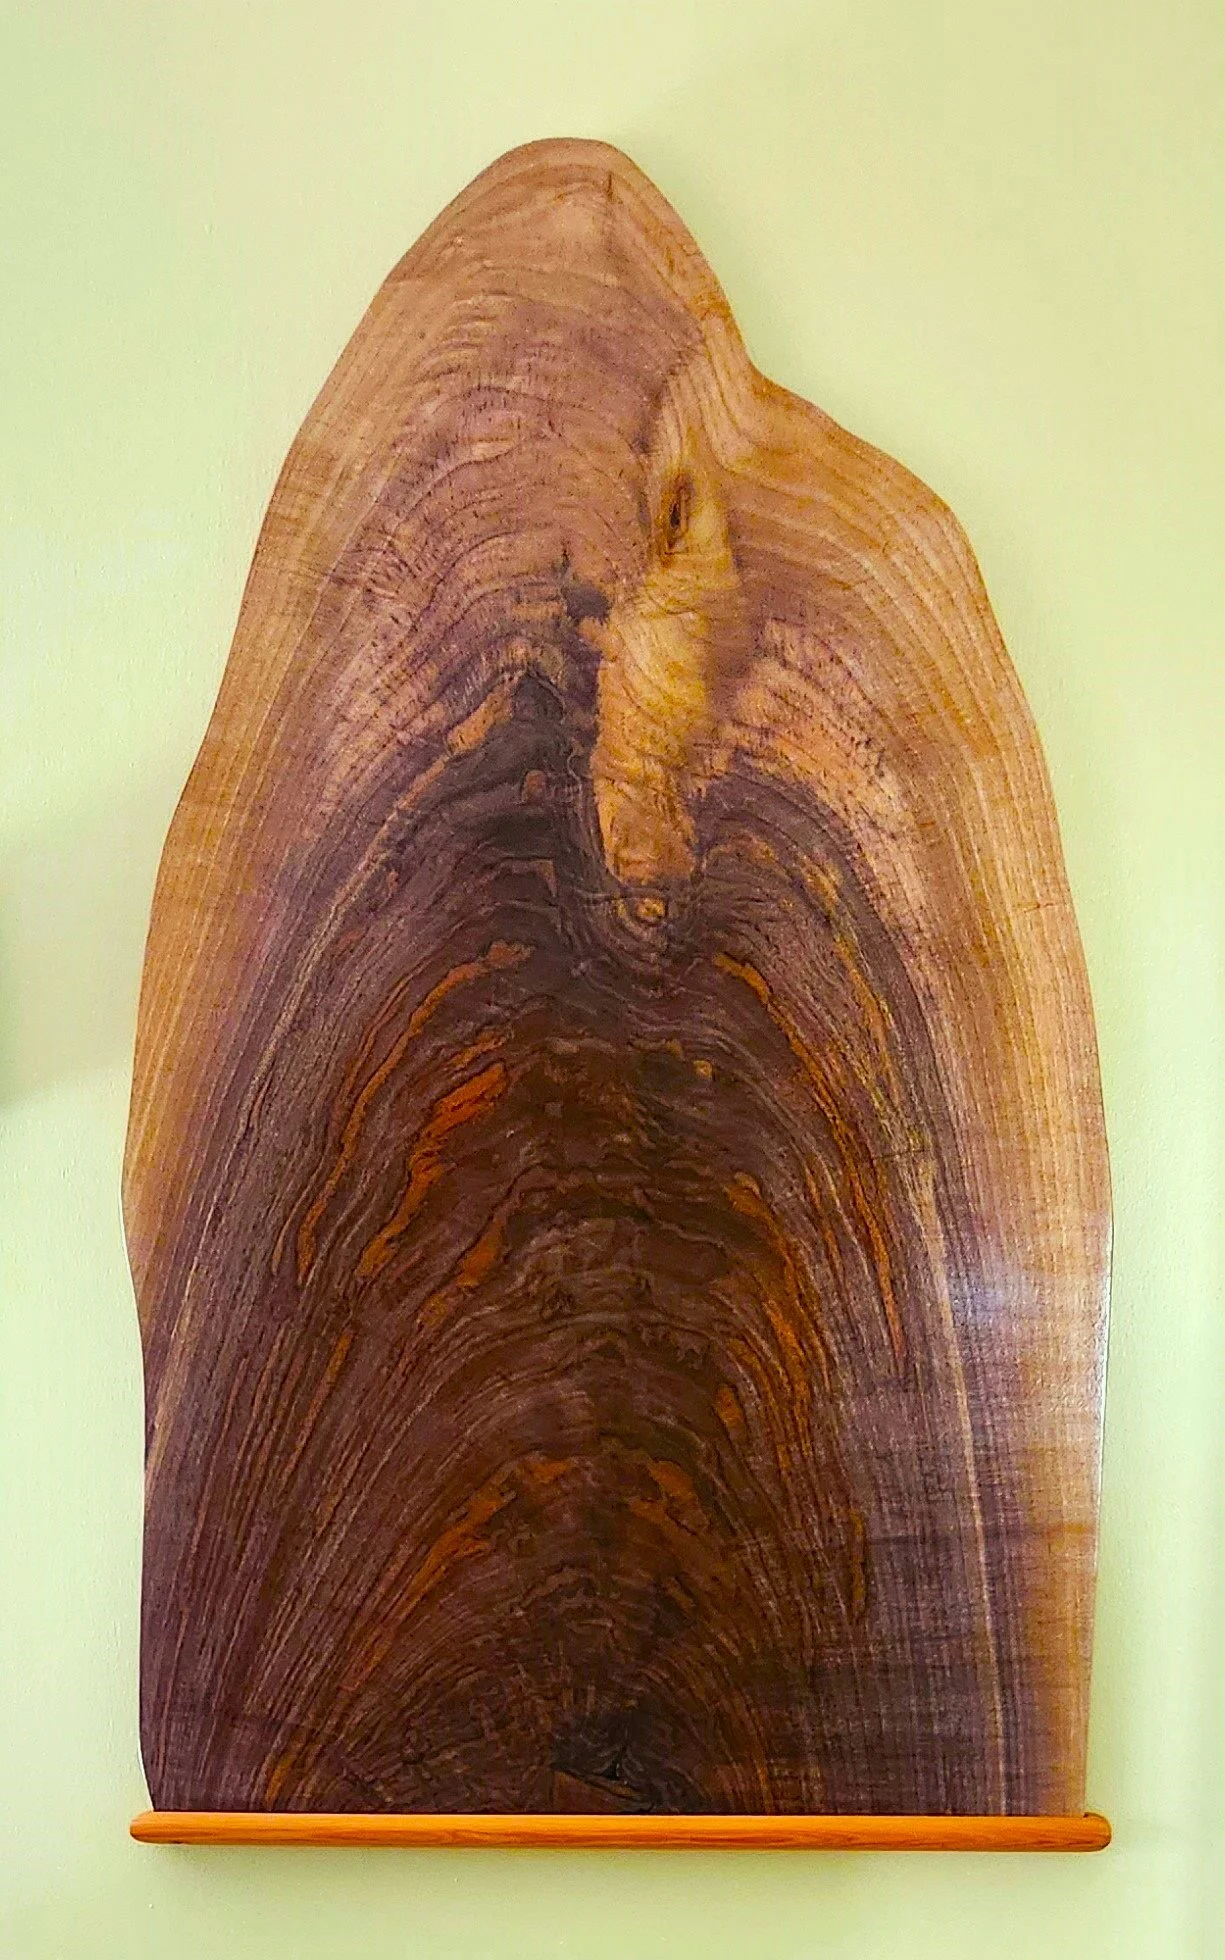
From the same tree and residing in the same room as the above…….


The slab supplier gifted me three small walnut slabs. Offcuts. Too small to make anything of consequence. I am experimenting. One piece has interesting grain; however, it was warped. After I flattened both sides it is only ½” thick. The grain is beautiful.
It now resides on the wall next to the live edge table and mirror.
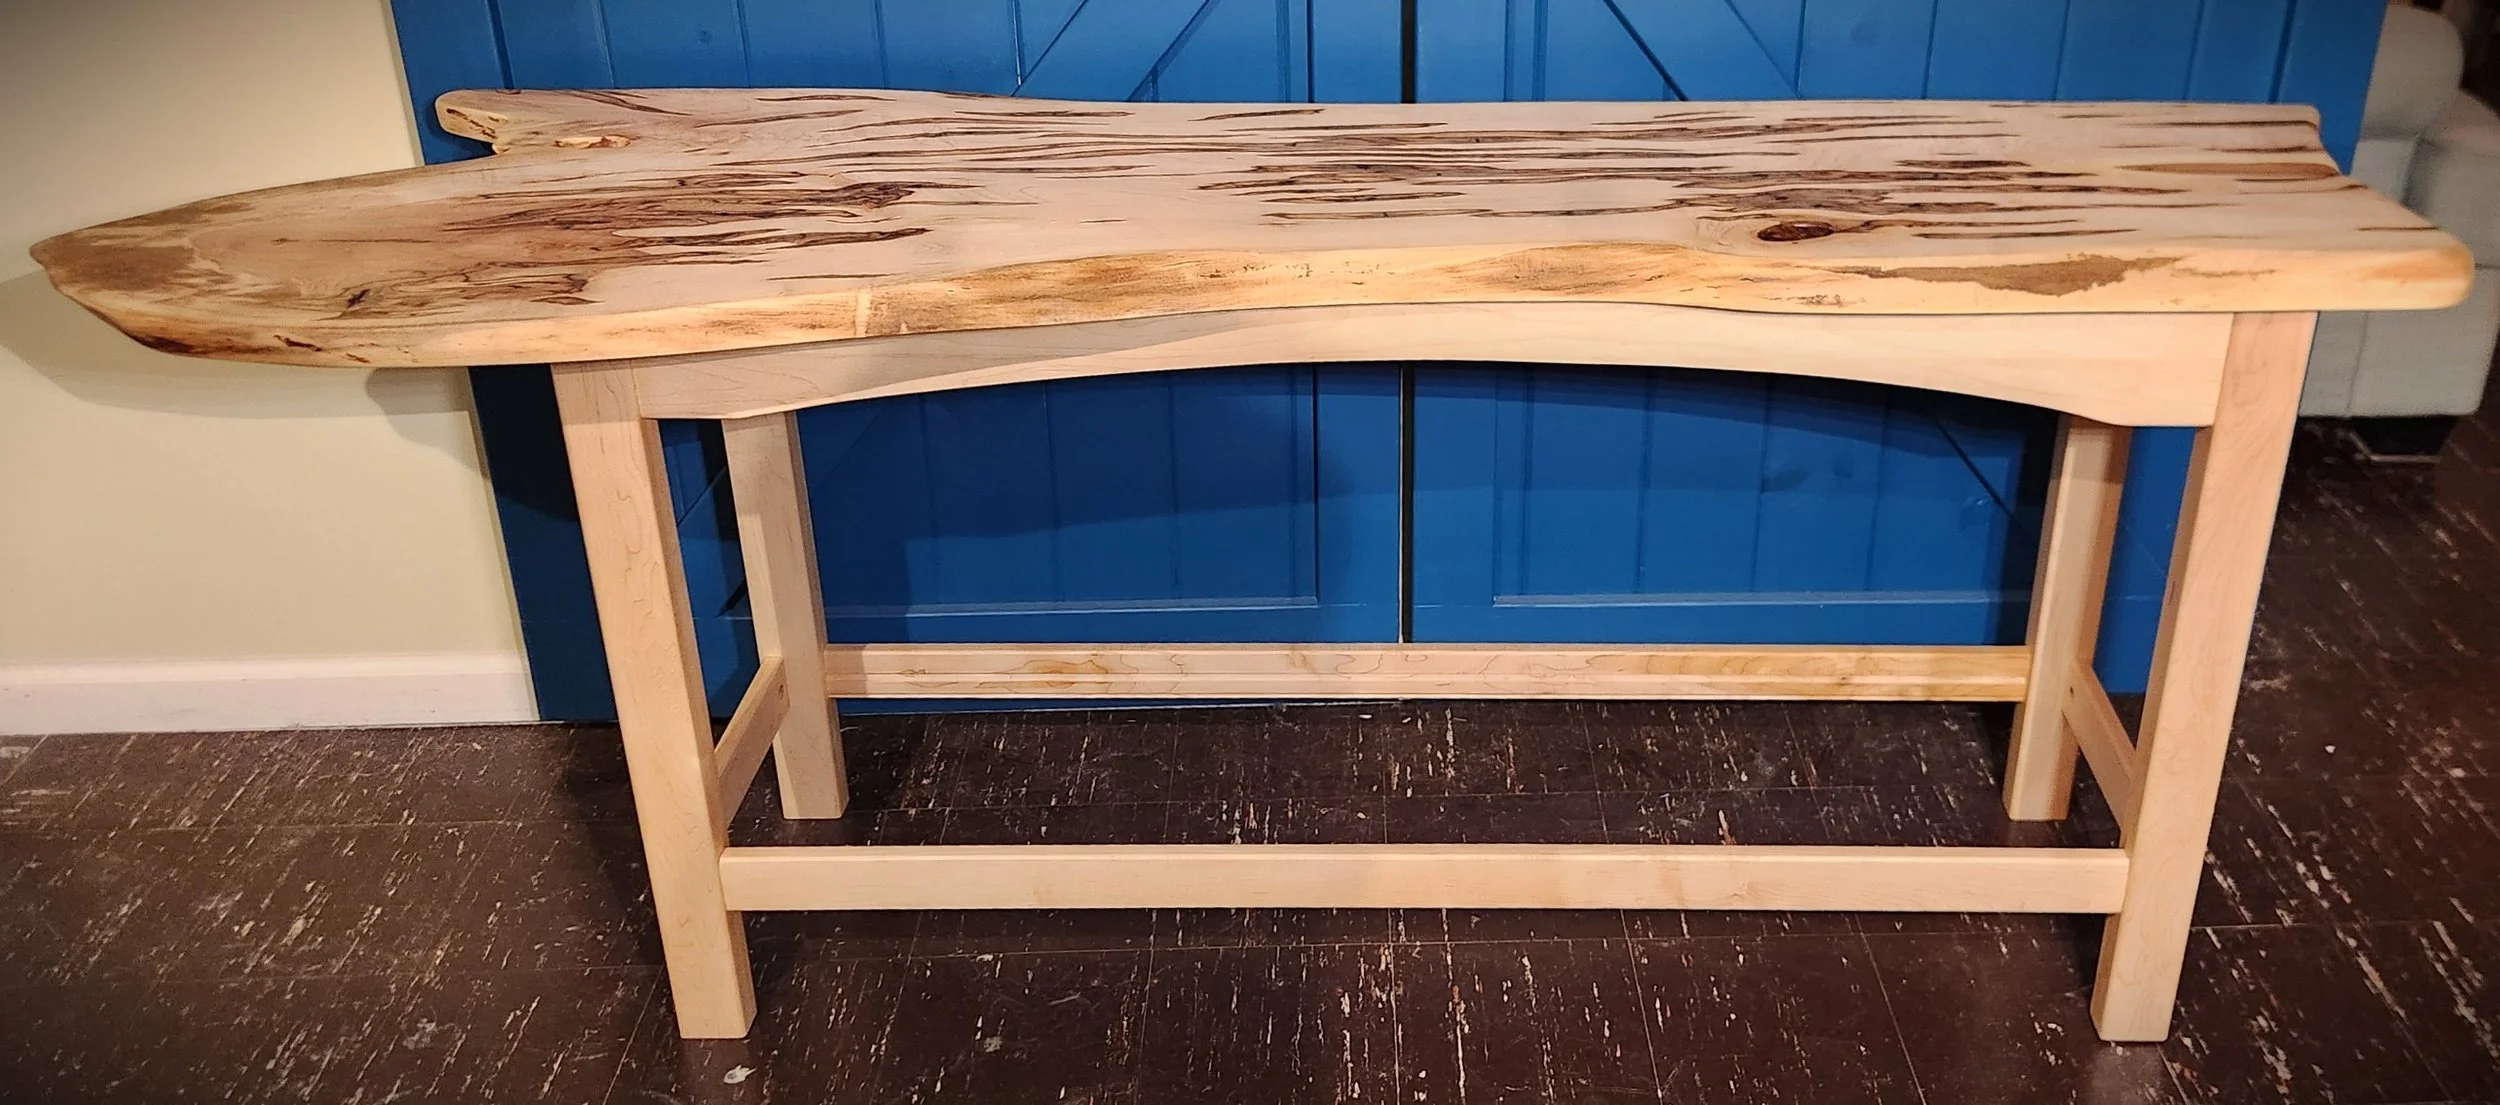
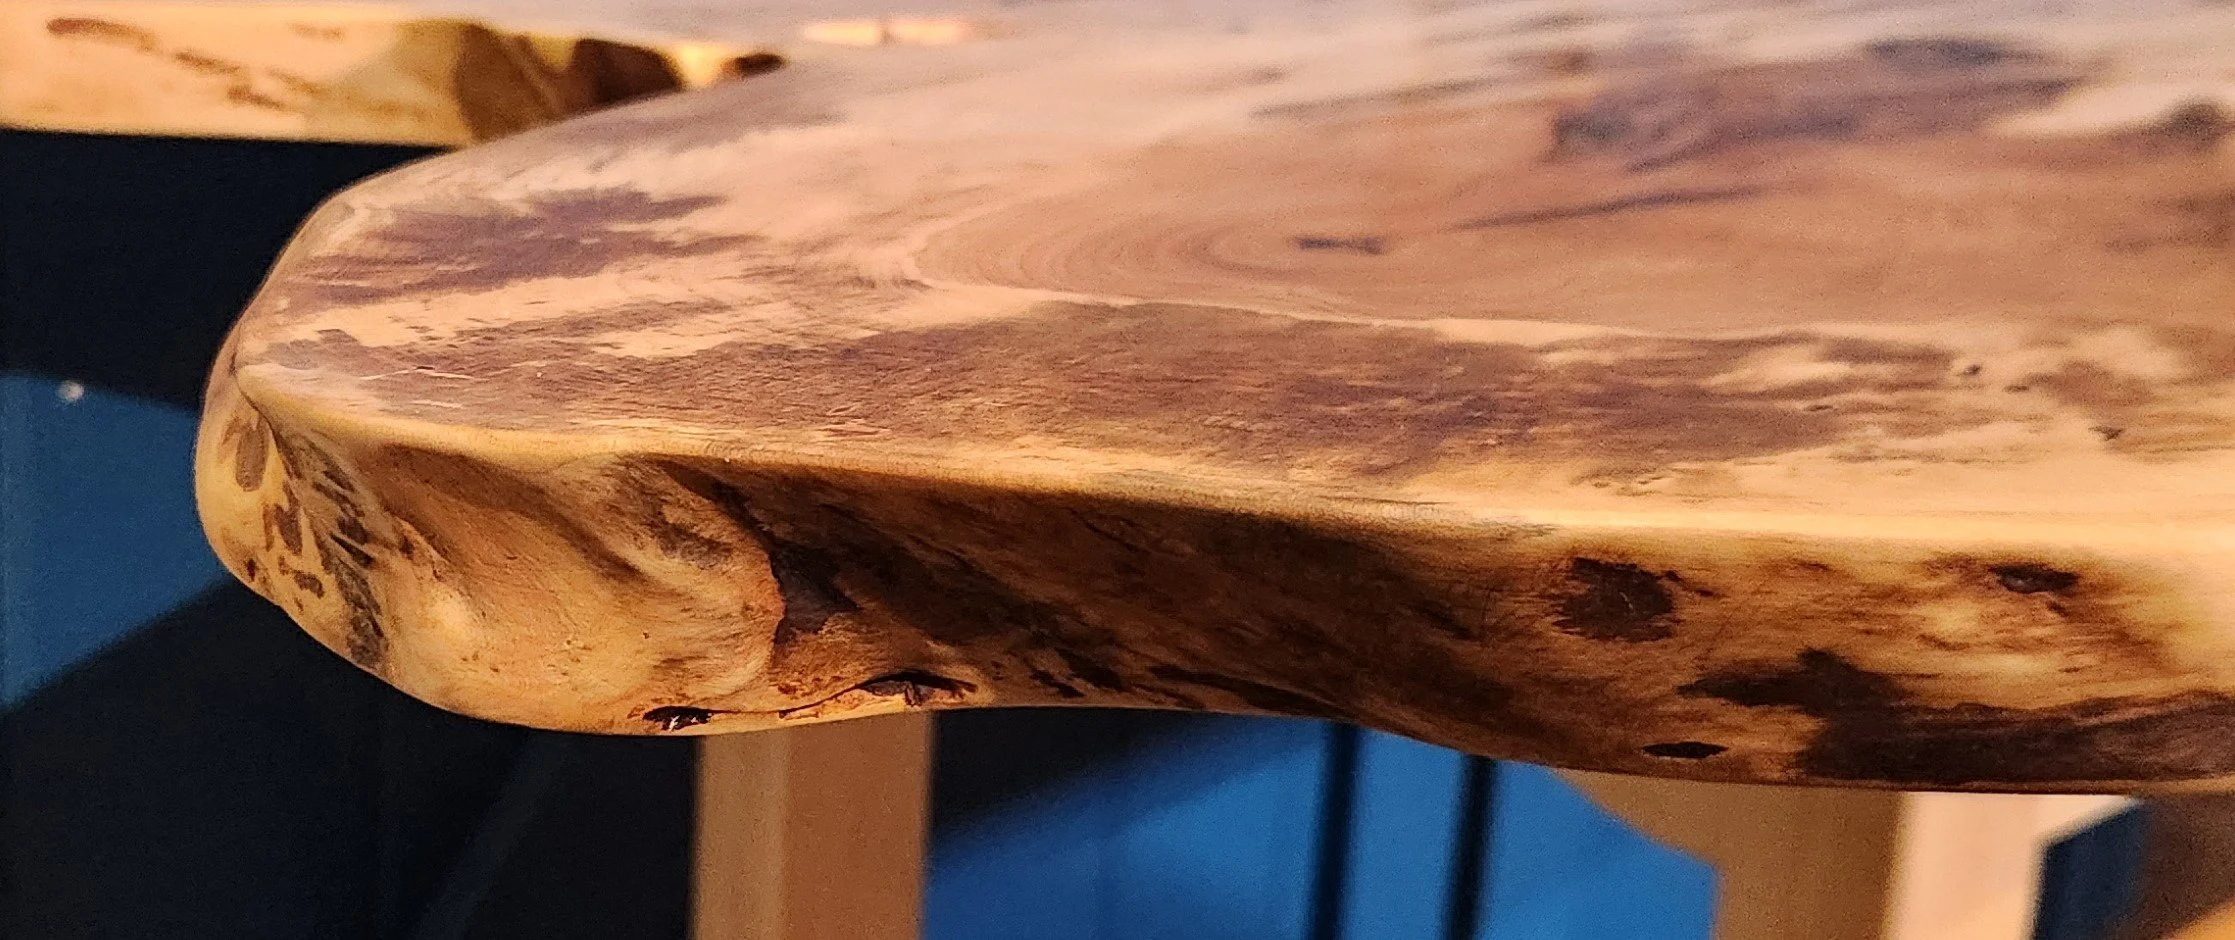
The WoodFisch acquired a slab of ambrosia maple from a local wood supplier. Eager to place his newly acquired Festool Domino Joiner to use he build these two tables……. a coffee table and a sideboard table. Both finished with multiple coats of a hand rubbed linseed oil / beeswax mixture.
Not from the Derecho
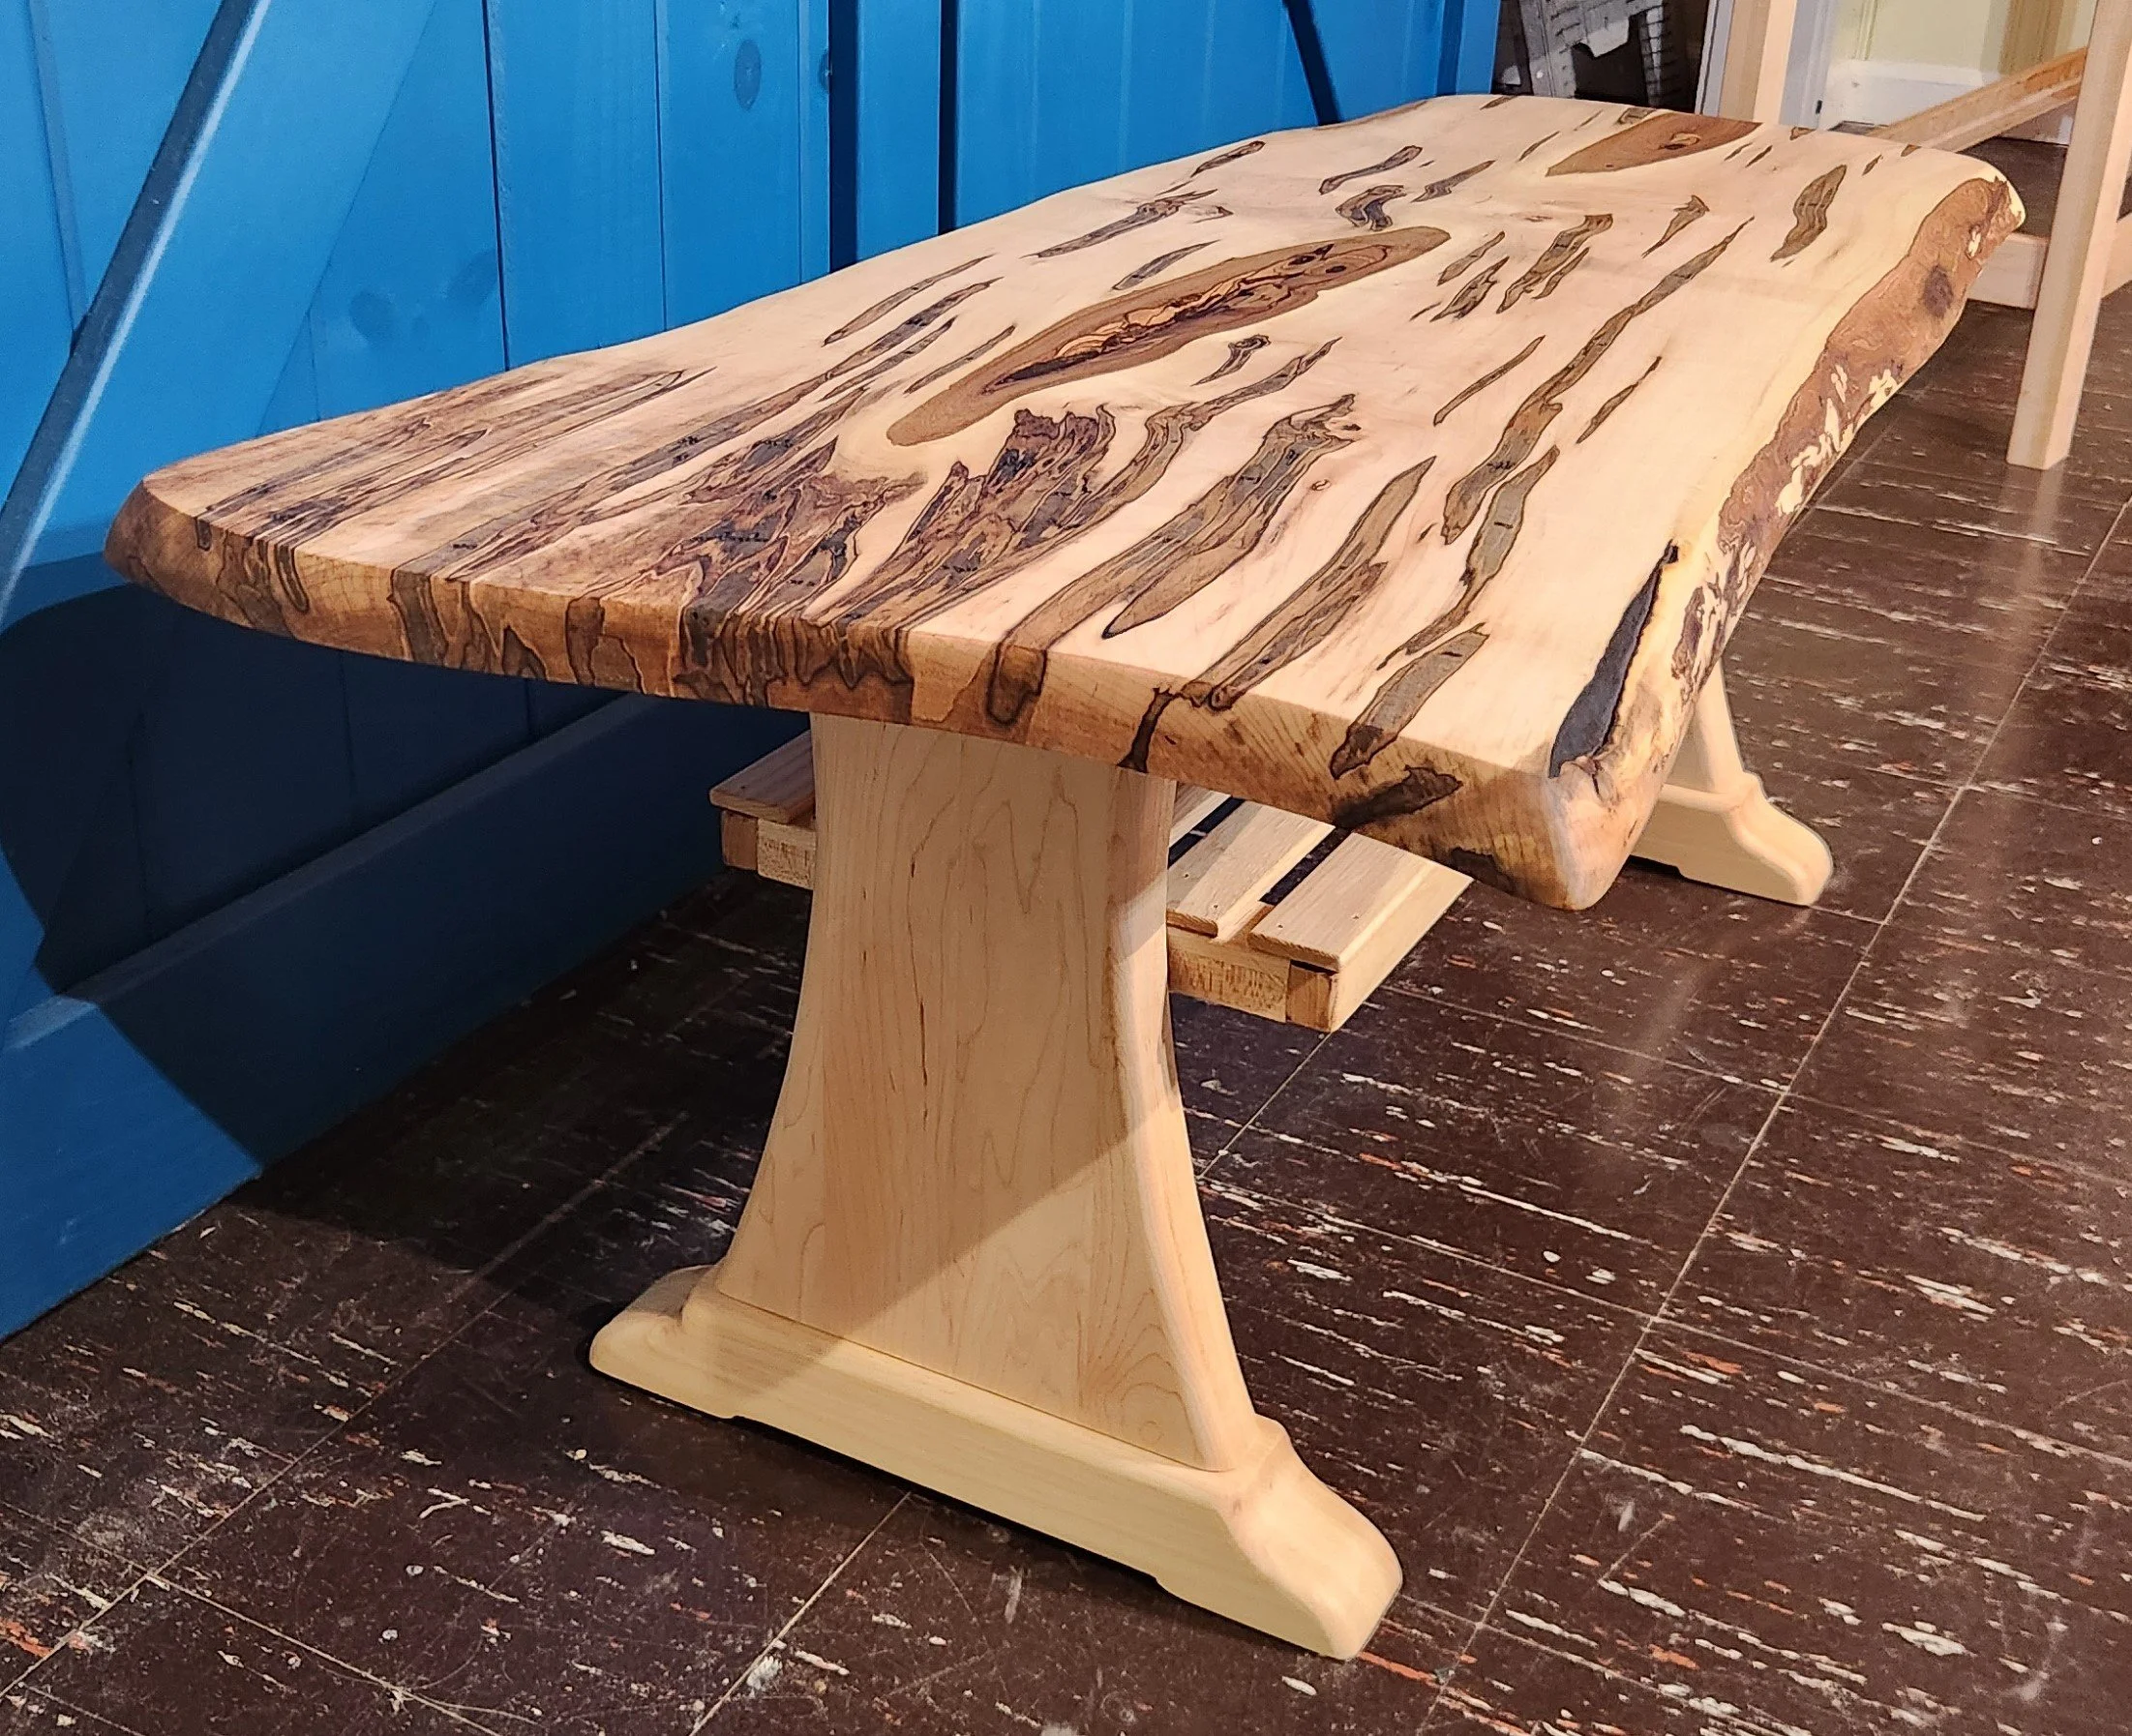


The Domino Joiner has the ability to use knockdown fasteners - similar to those used in Ikea furniture; albeit, of industrial strength. These fasteners were used for sections of the sideboard table to allow for assembly / disassembly in transport. Like for The WoodFisch’s artisan show events.